
In this post, I will be sharing in detail my experience of hosting Asp.Net Core Web Api on AWS EC2 Linux instance. Some of the steps are detailed and you might want to skip those steps.
Step 1: Create a DotNet Core Web Api project
Start Visual Studio 2017 and click on File -> New -> Project and then select Web -> Asp.Net Core Web Application from the templates and click Ok.
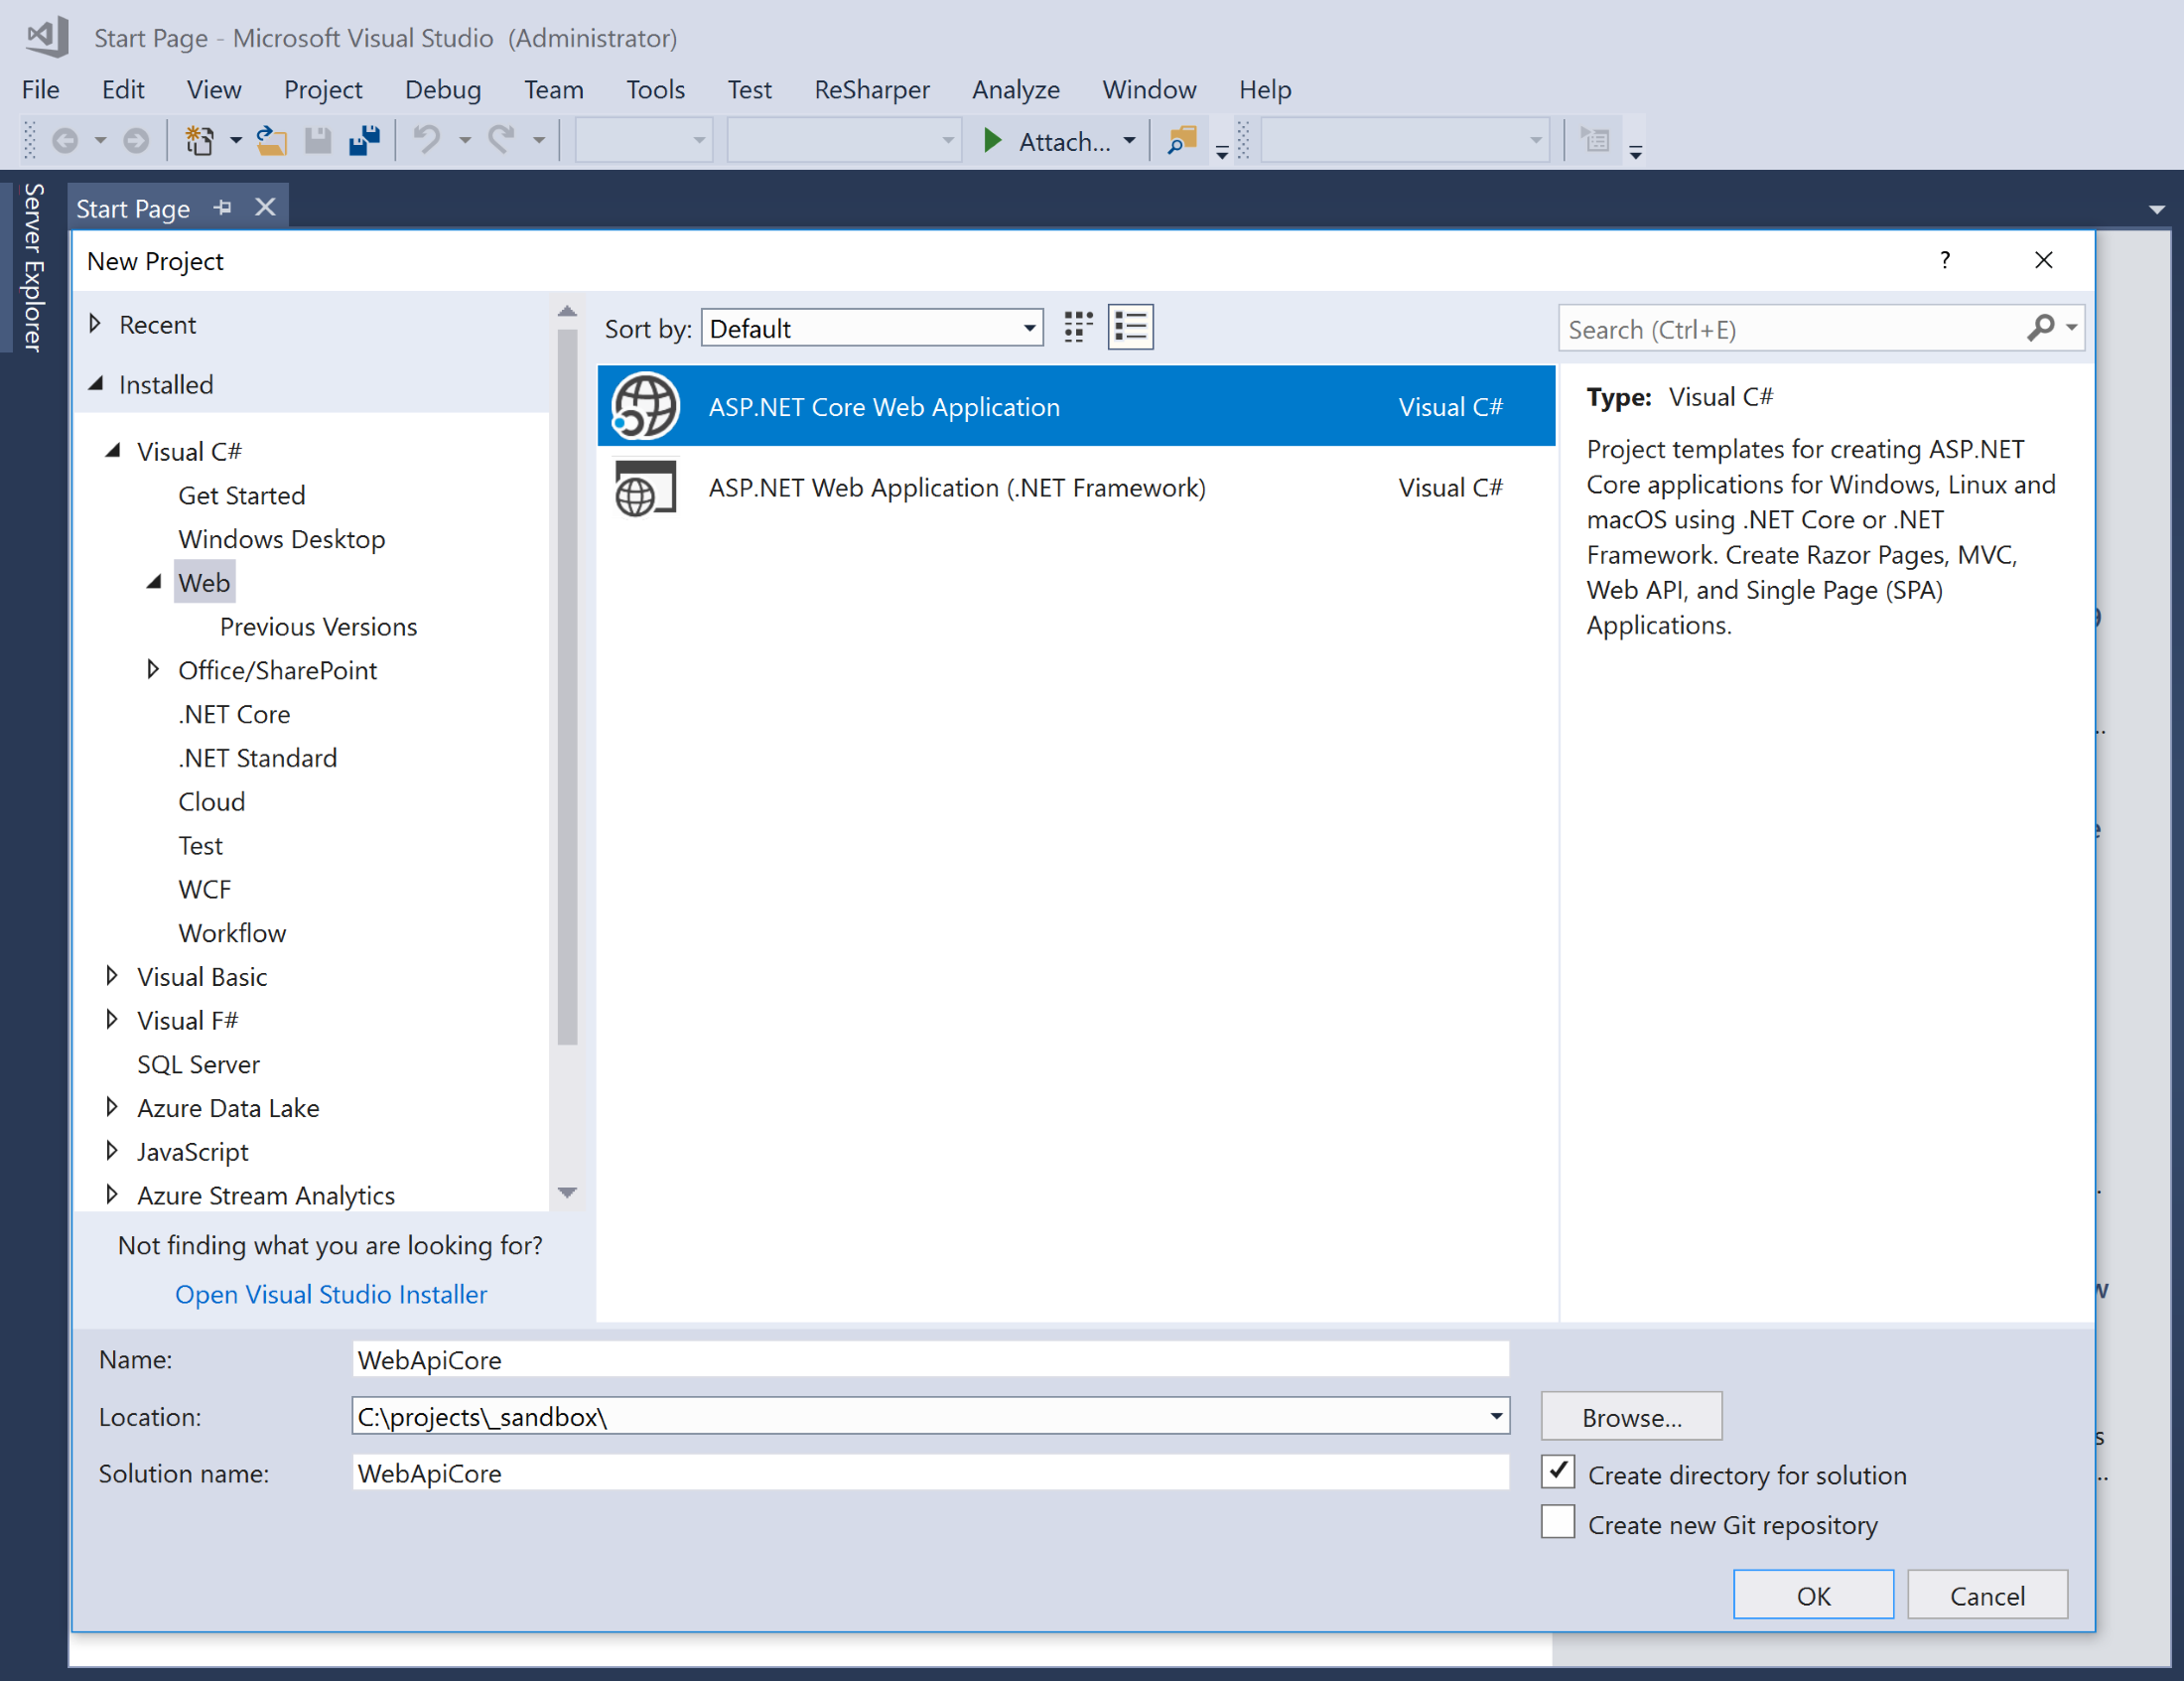
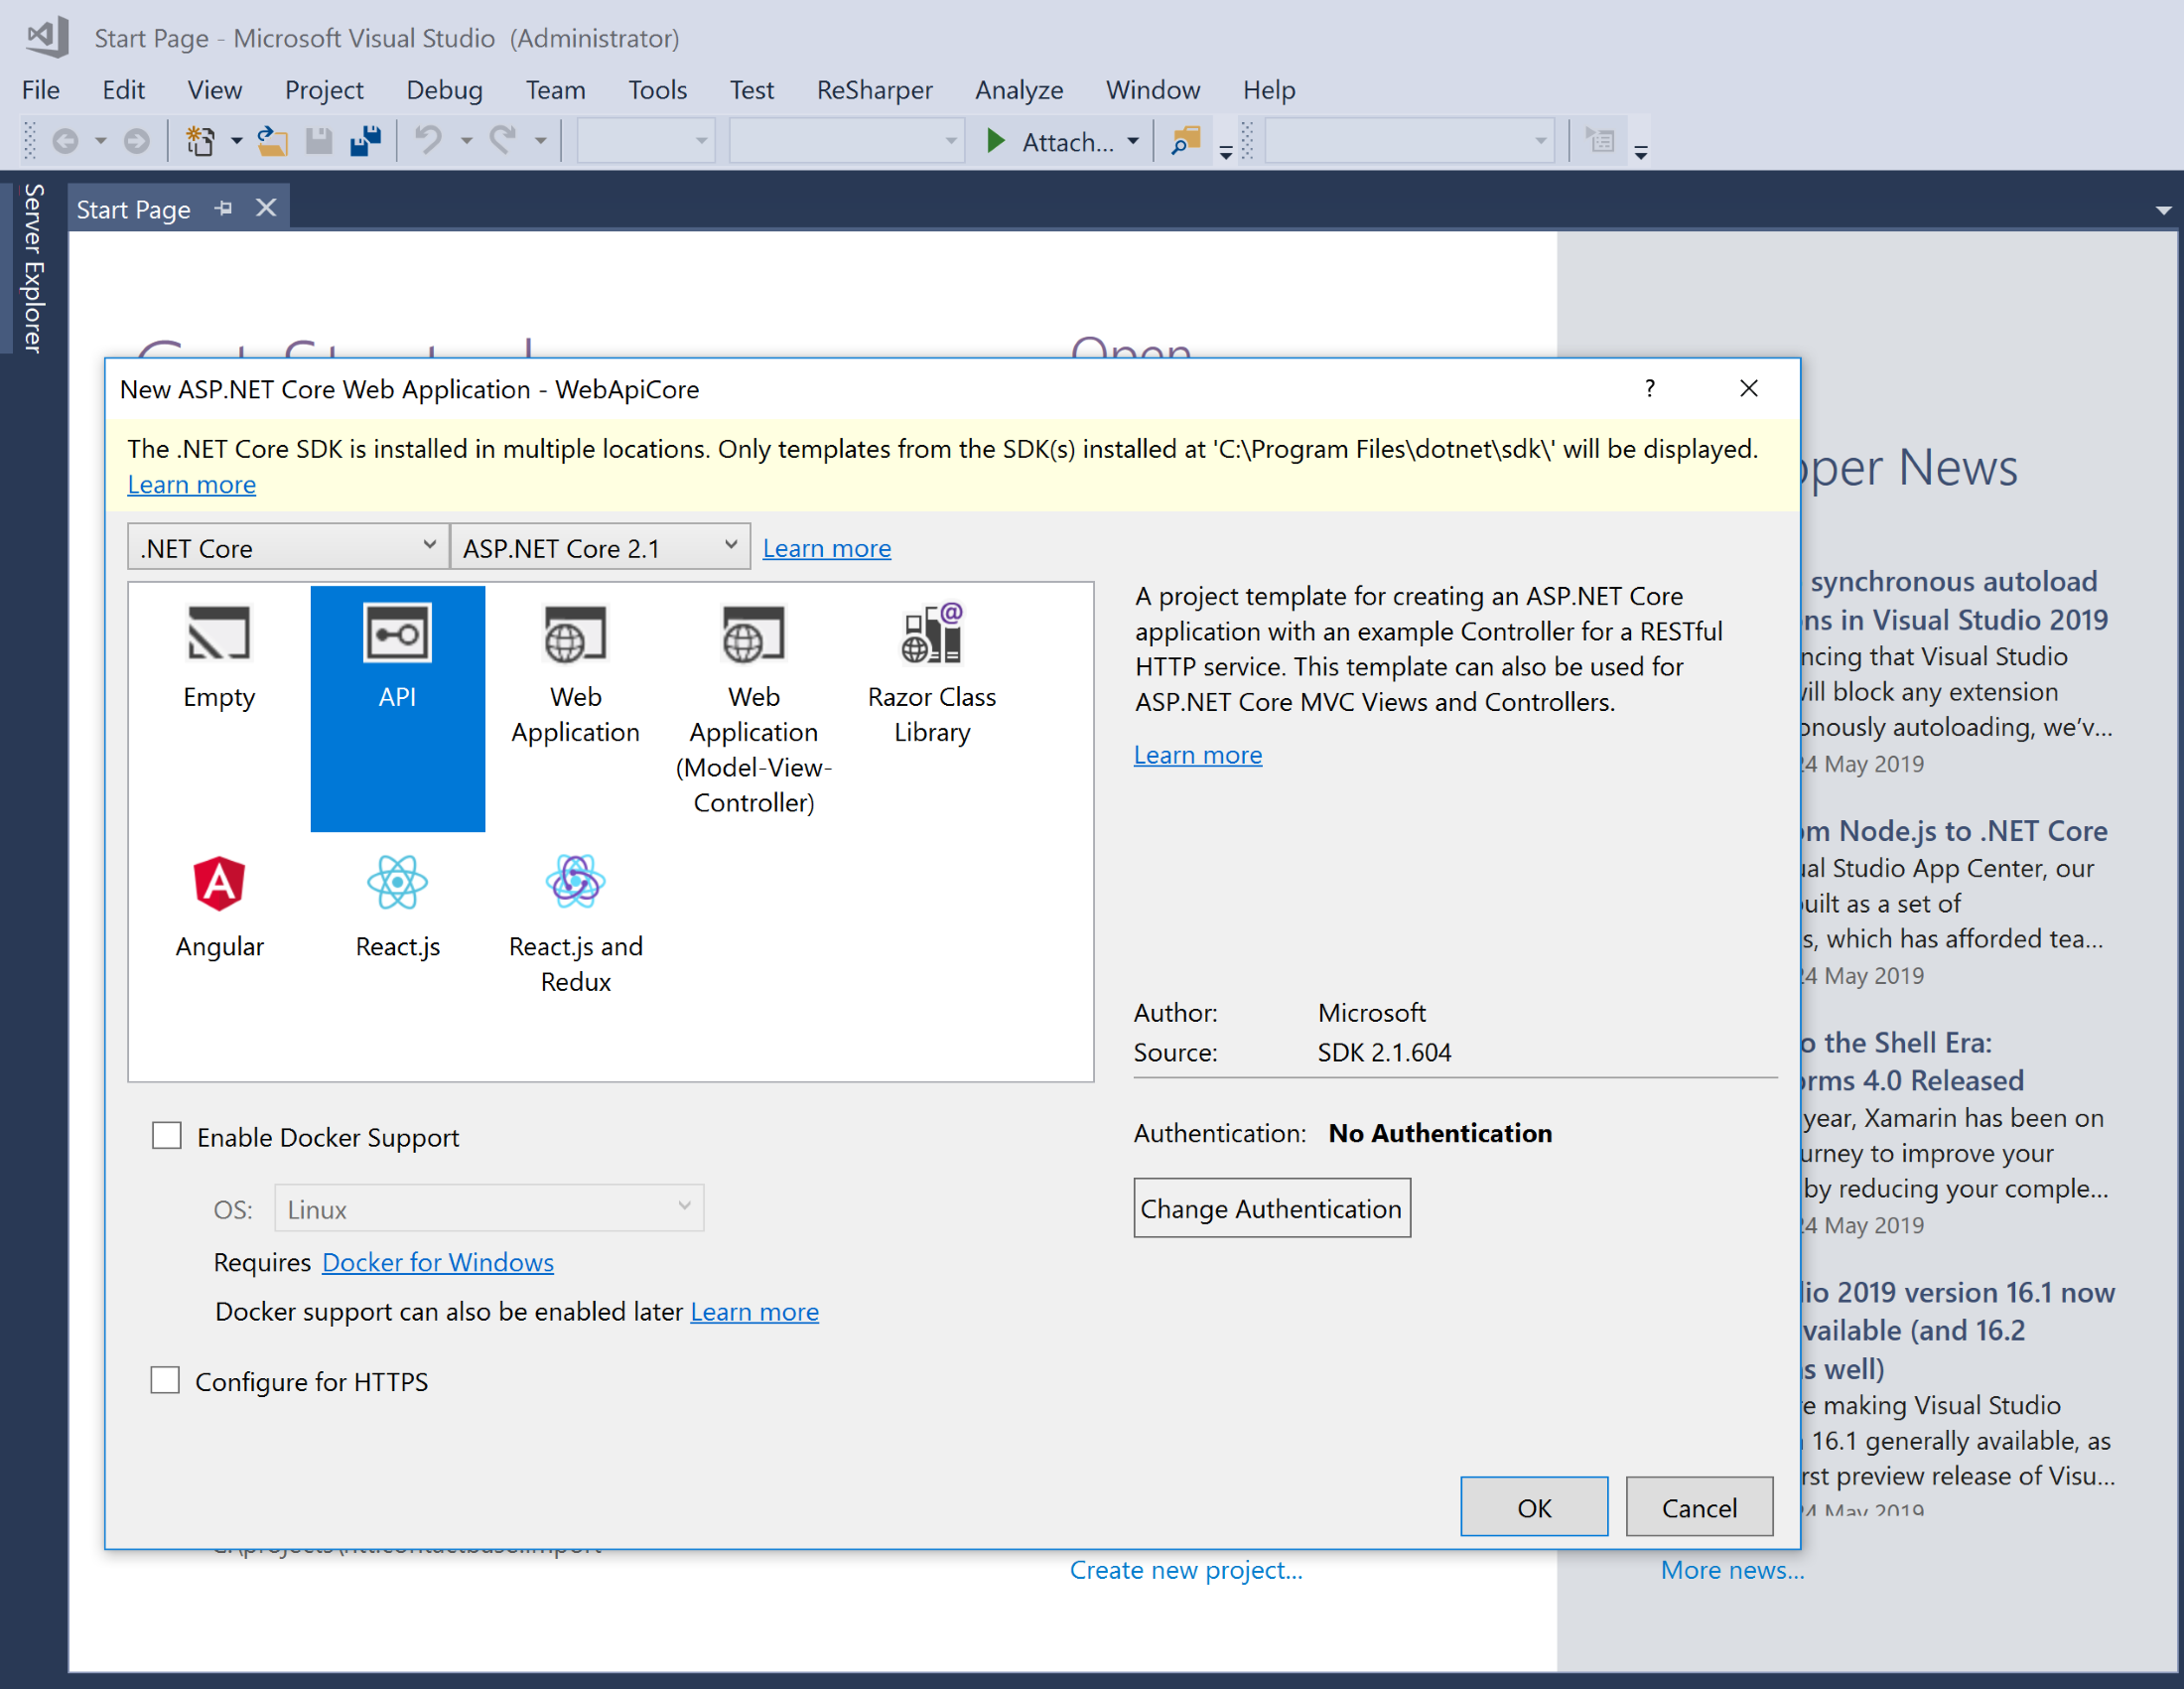
Next choose API from the options and click Ok.
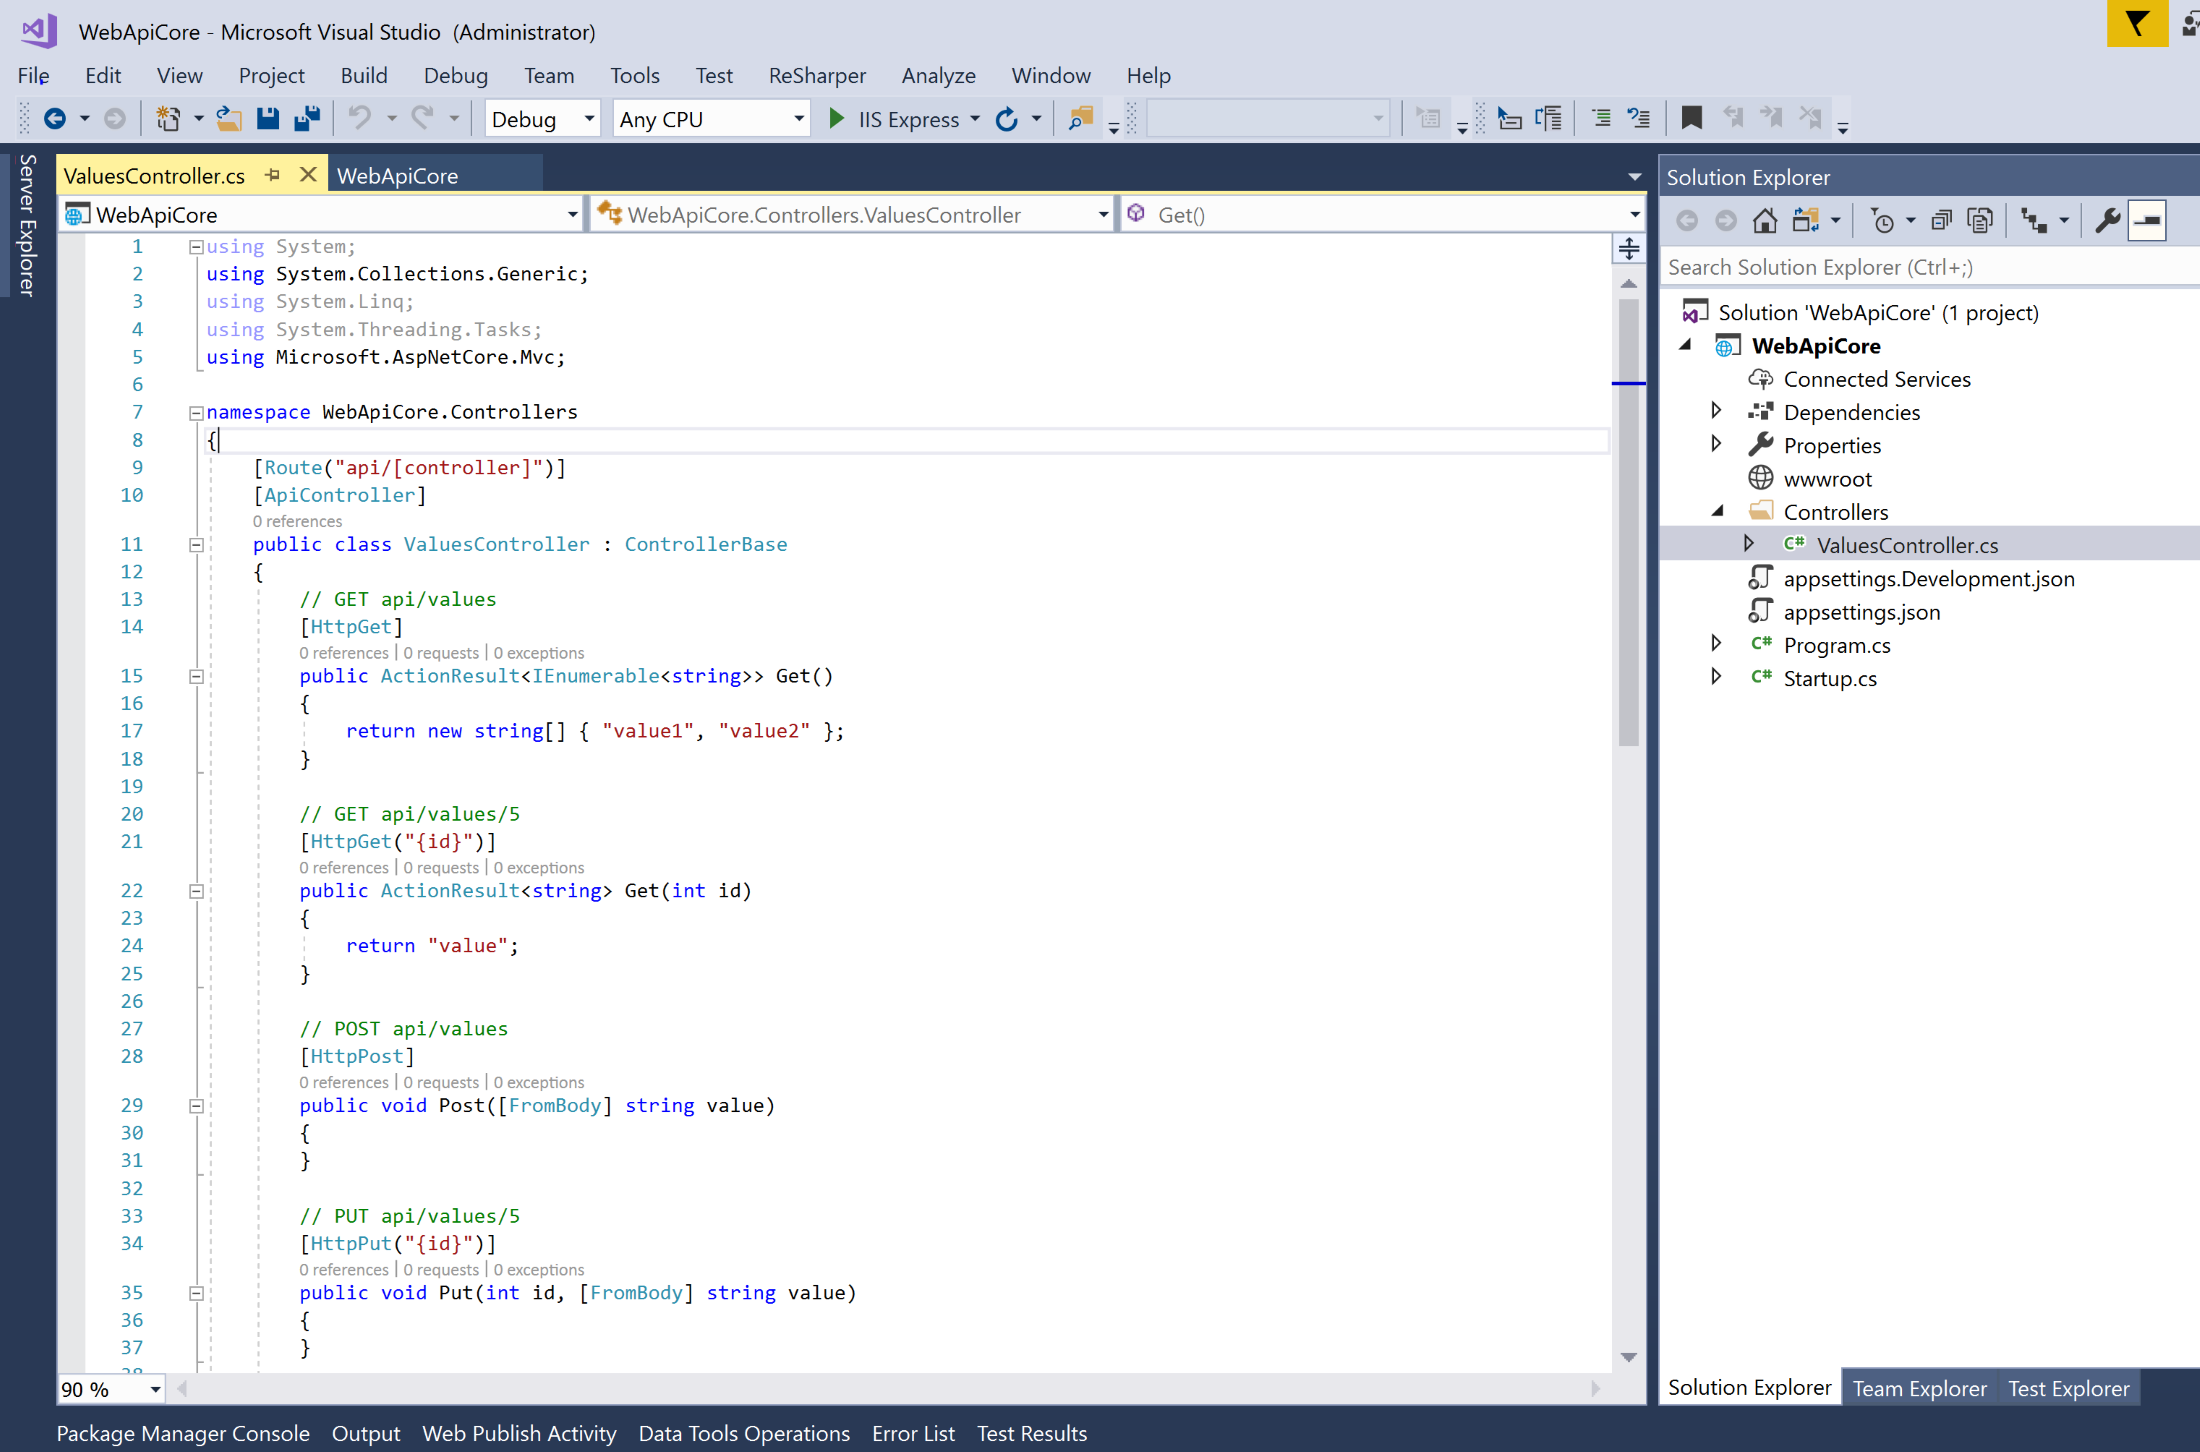
Now we will have the project created. I am not making any changes to the code and will leave ValuesController as it is so api/values will return value1 and value2.
Run the application and it should display results from the api/values call.

Step 2: Create a deployment package
Let's create the deployment package which we will copy to EC2 instance.
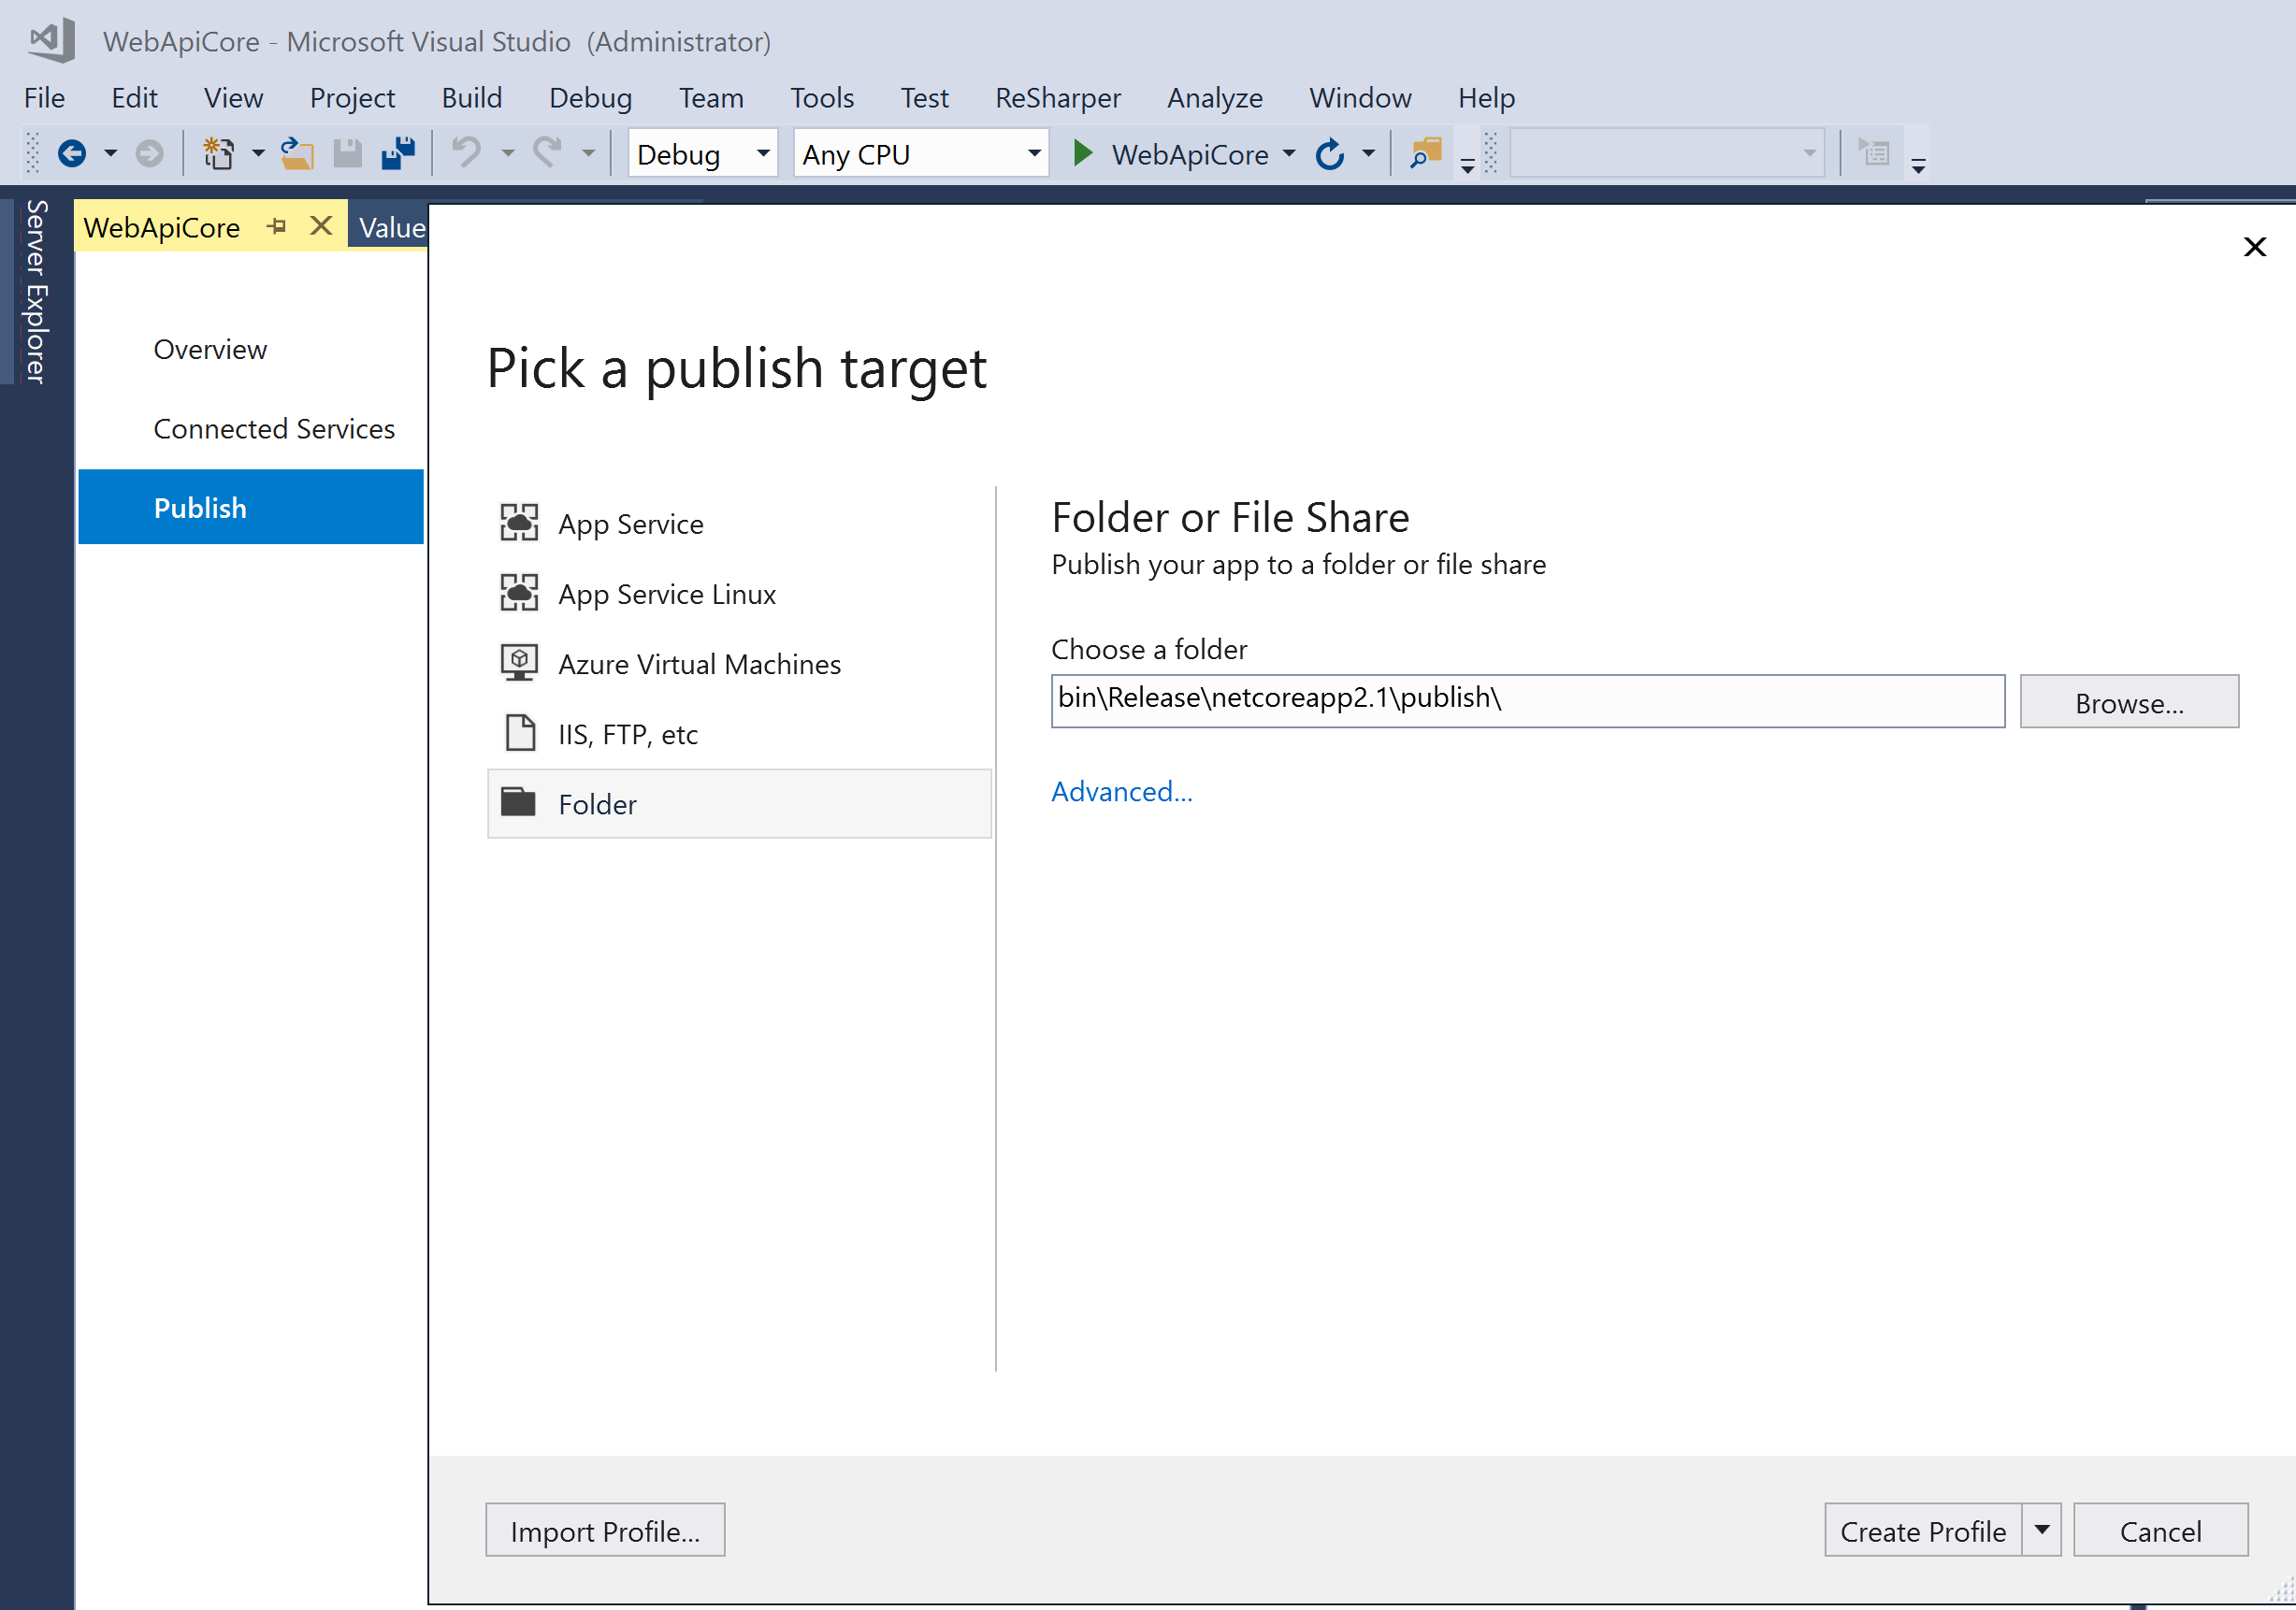
Right click WebApiCore project and select Publish. This will bring up the publishing dialog.
From right menu, pick Folder as publishing target. Leave folder location in Choose a folder as it is.
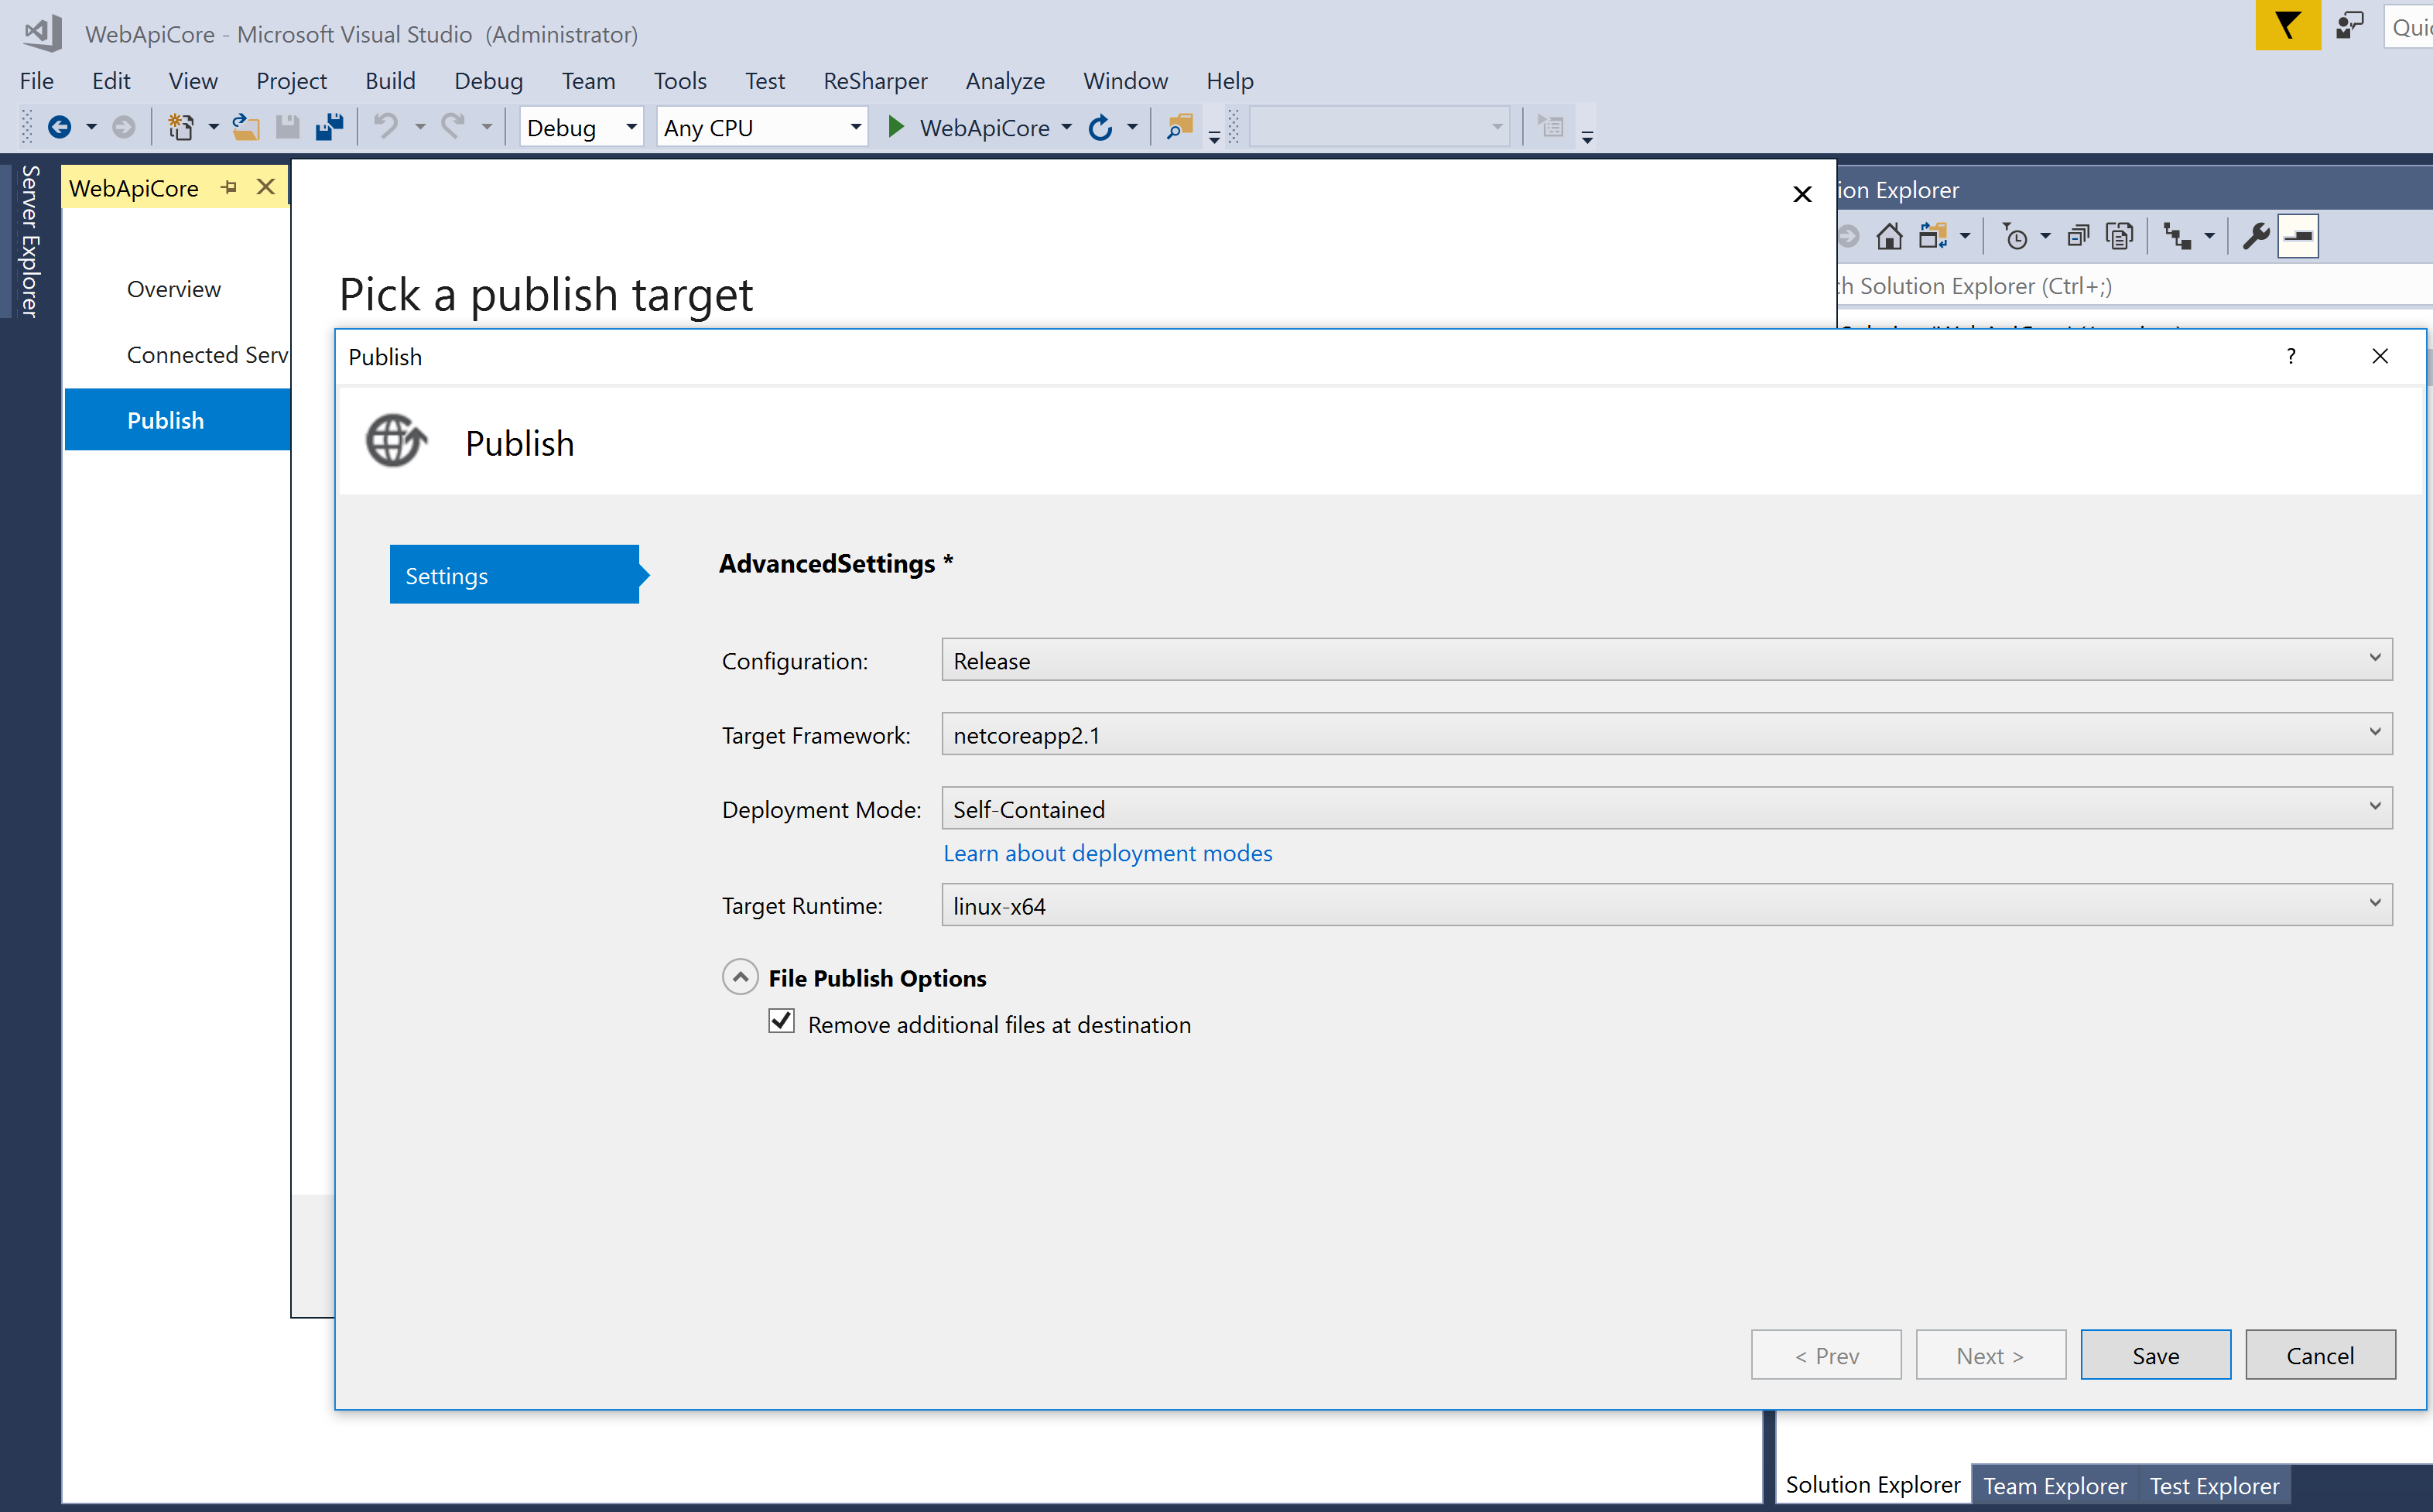
Click Advanced, and then set the options as below and hit Save.
Now click on Create Profile at at the bottom of the dialog. This will create a FolderProfile.
Hit the Publish button.
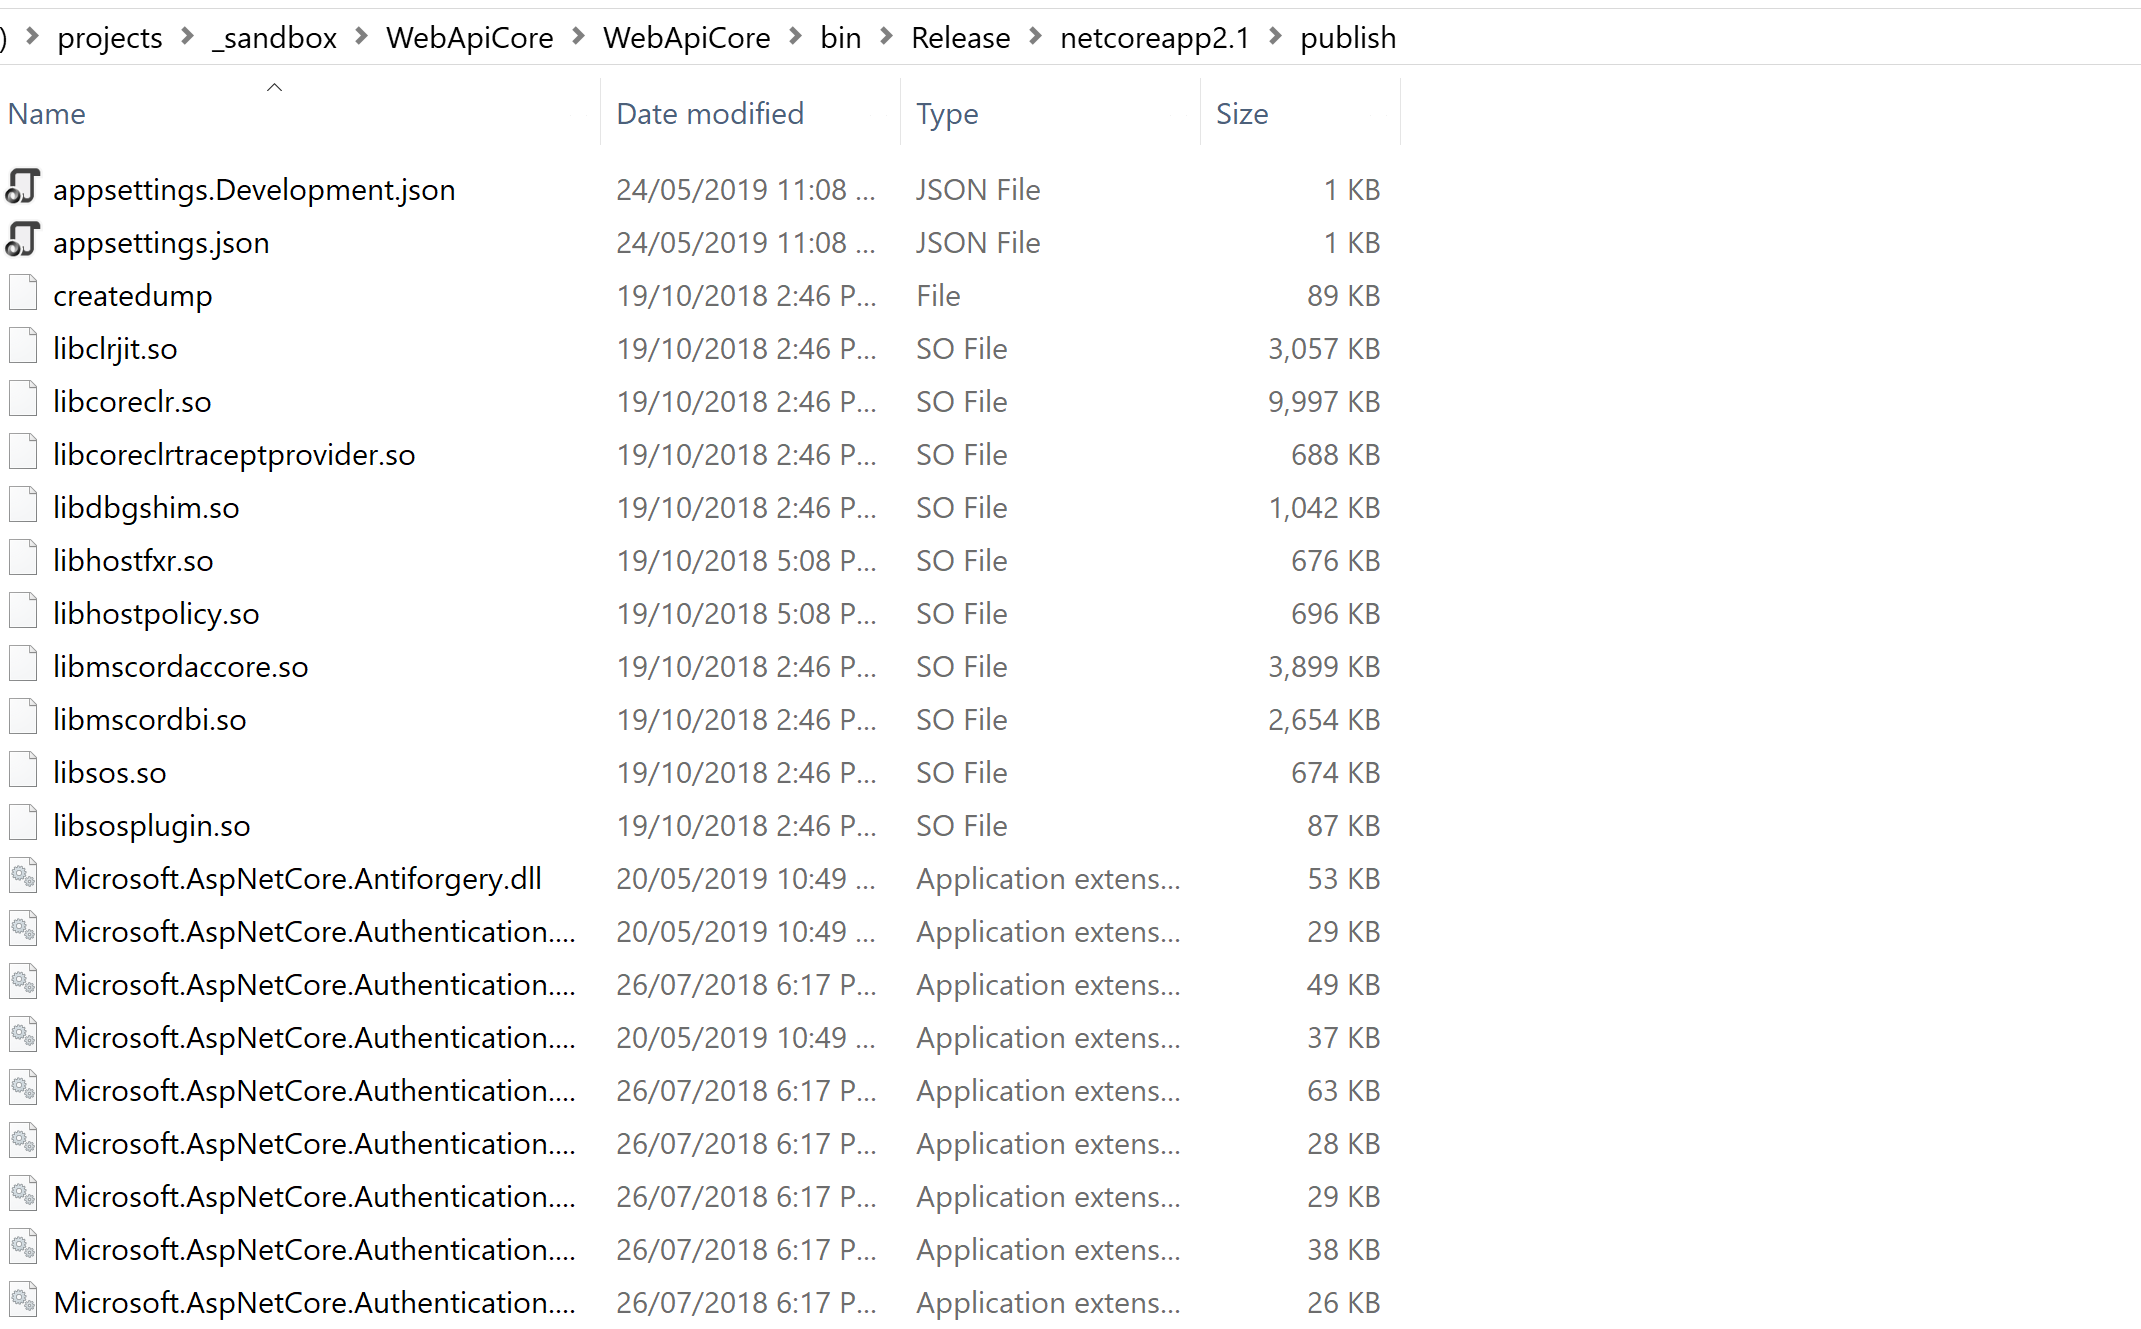
Once finished, check the Target Location to find publish artefacts, which I will use for deployment.
Step 3: Create AWS Linux EC2 Instance
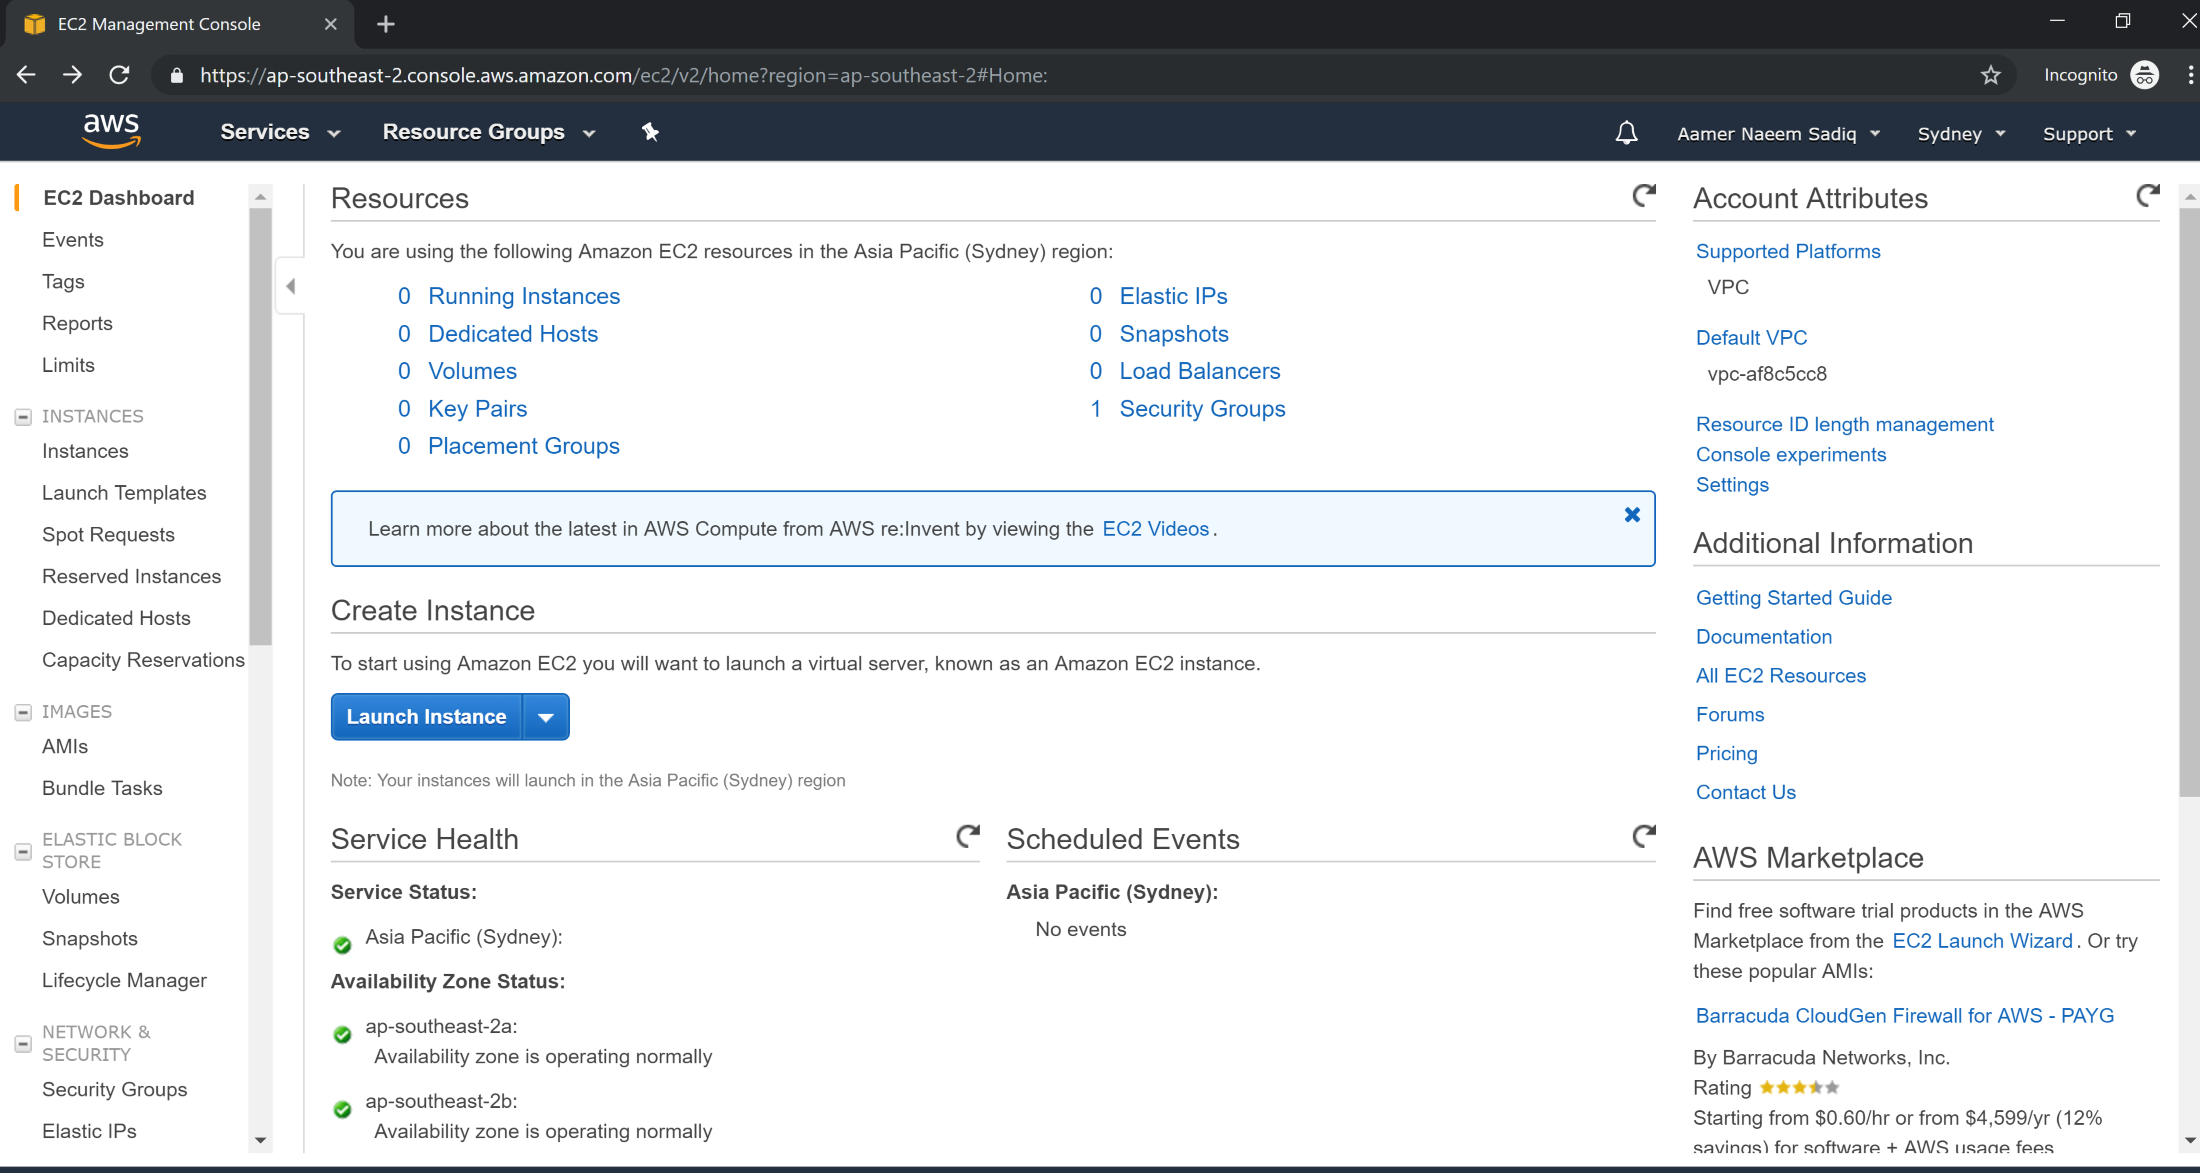
Let's create an EC2 instance by logging on to AWS management console at https://console.aws.amazon.com/console/home.
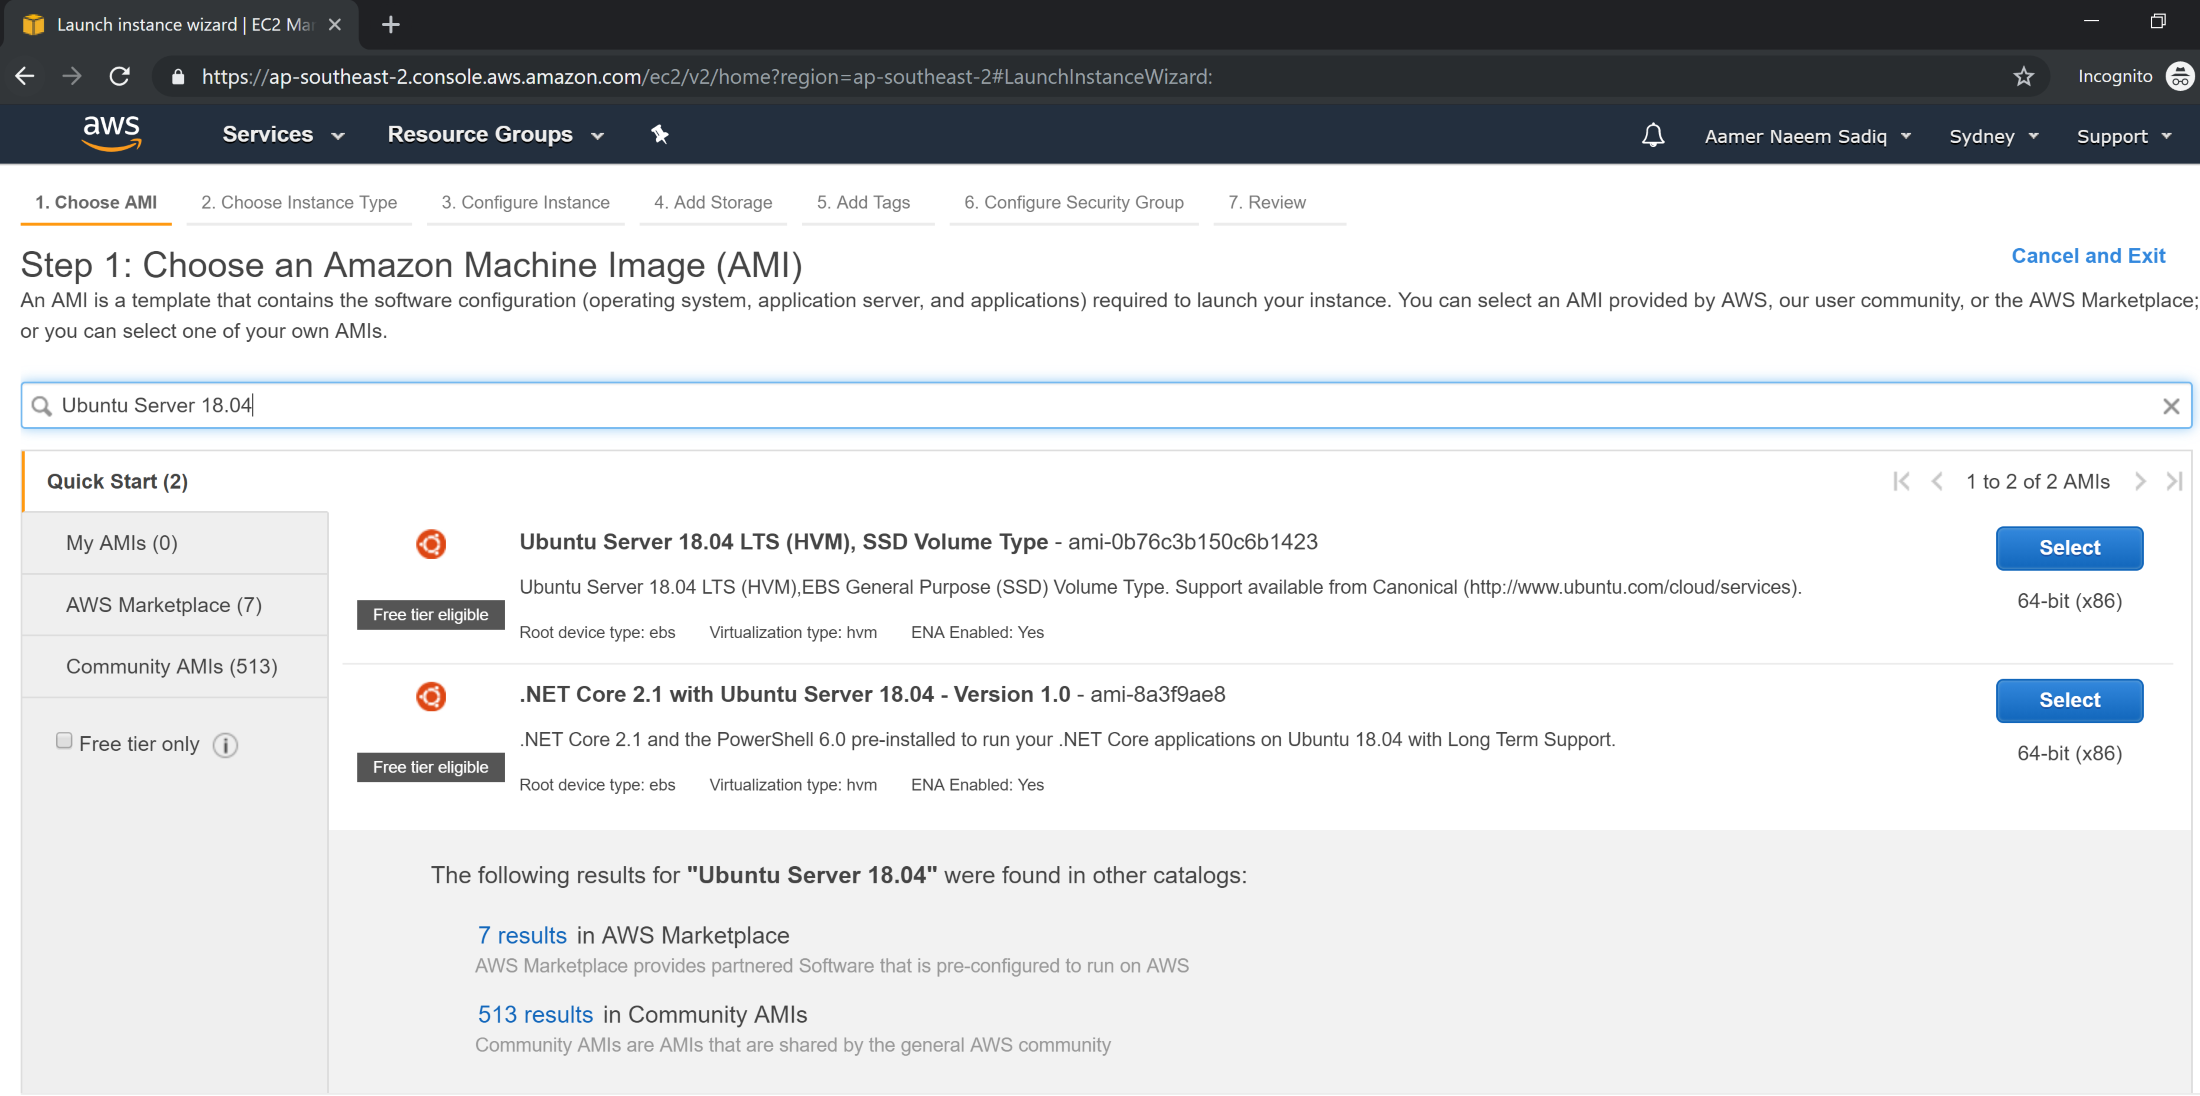
Go to EC2 dashboard and click on Launch Template. Search for Ubuntu Server 18.04 and select Ubuntu Server 18.04 LTS (HVM), SSD Volume Type (you can select other images as well, I just used this one).
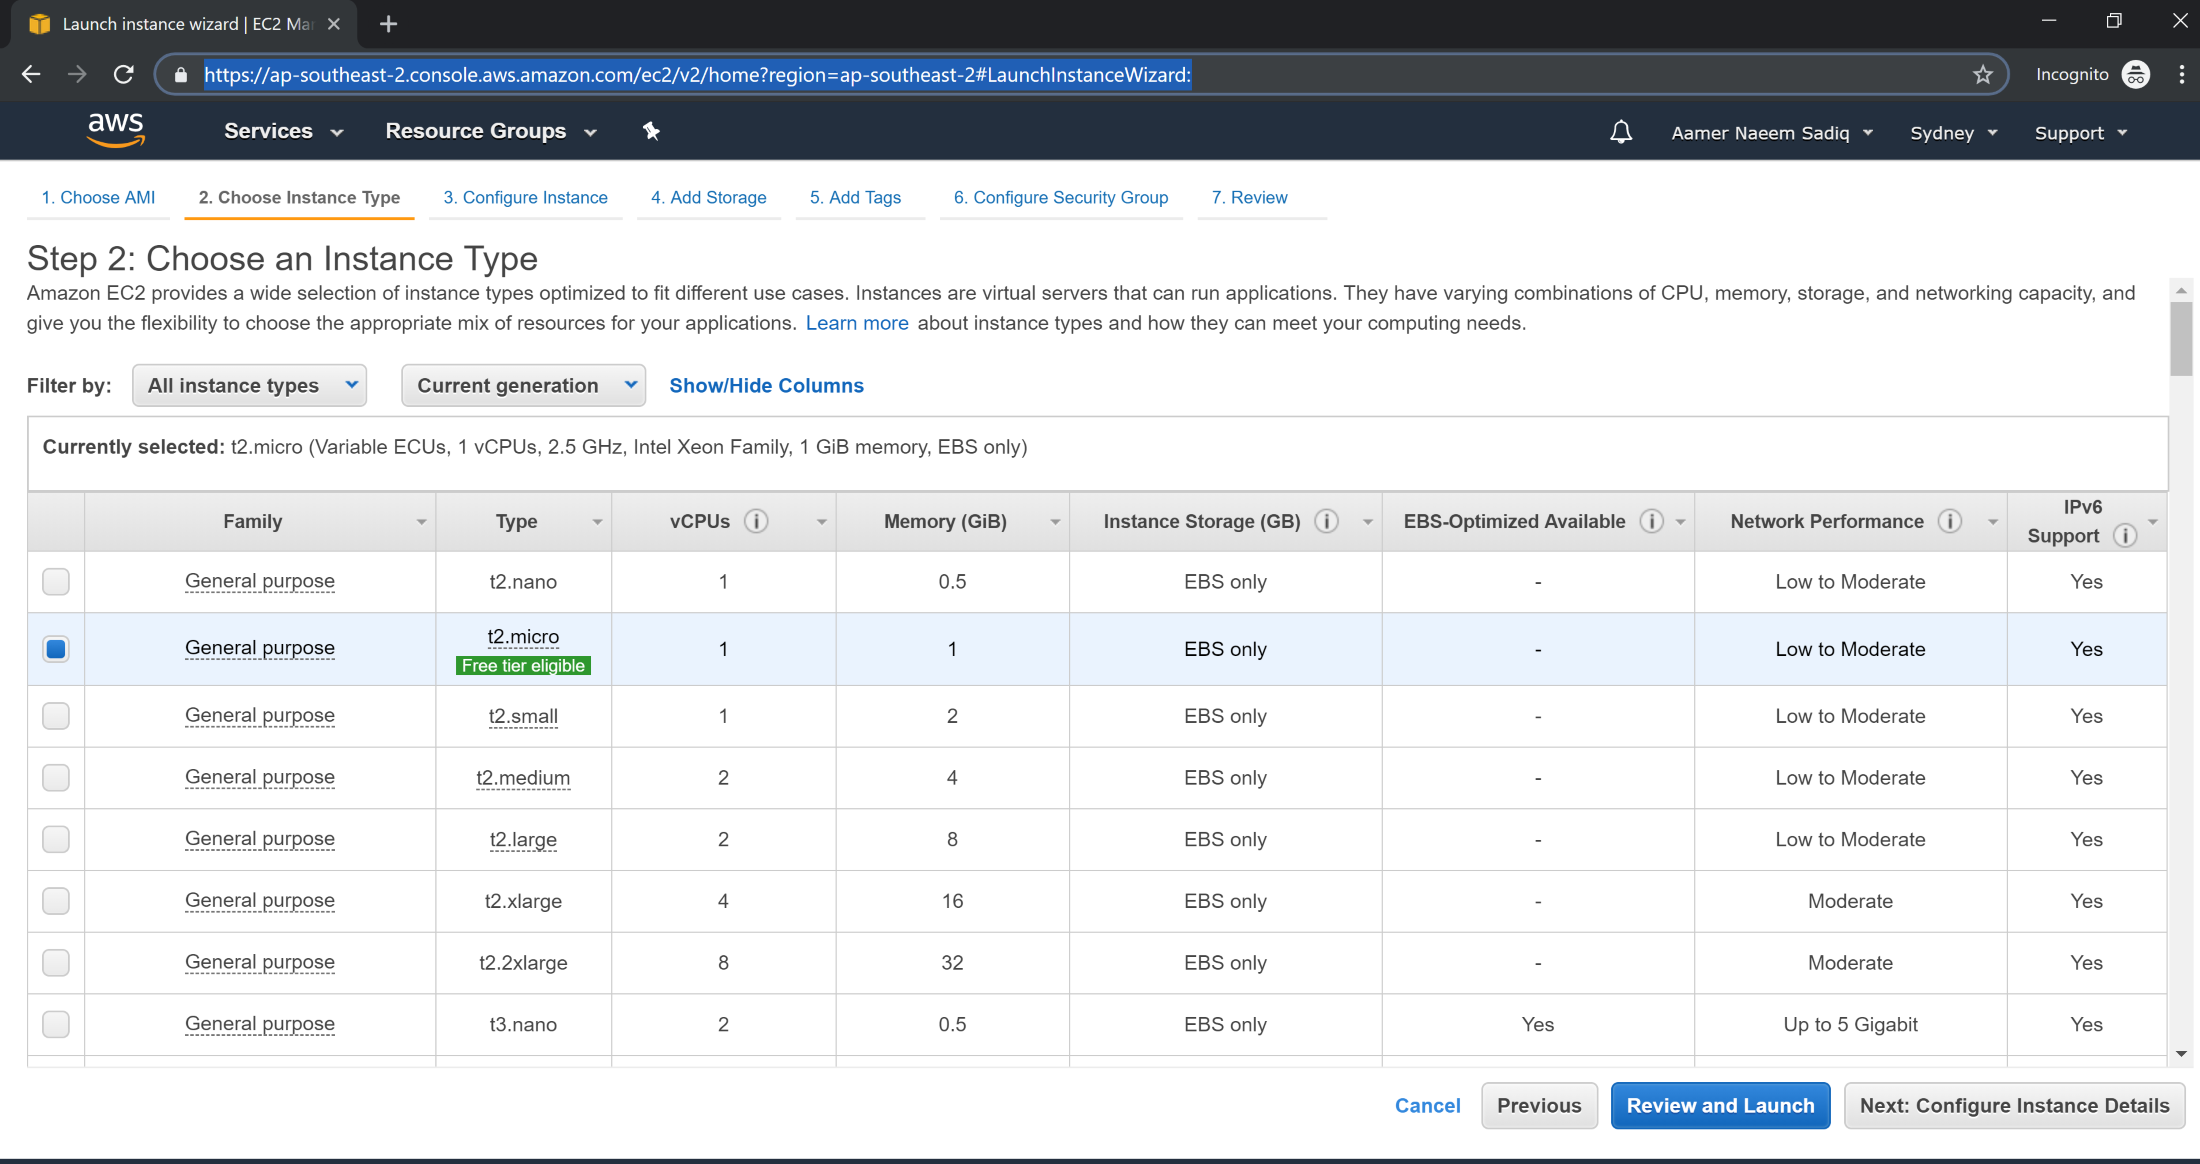
Next choose instance type eligible for free tier. Click Configure Instance Details
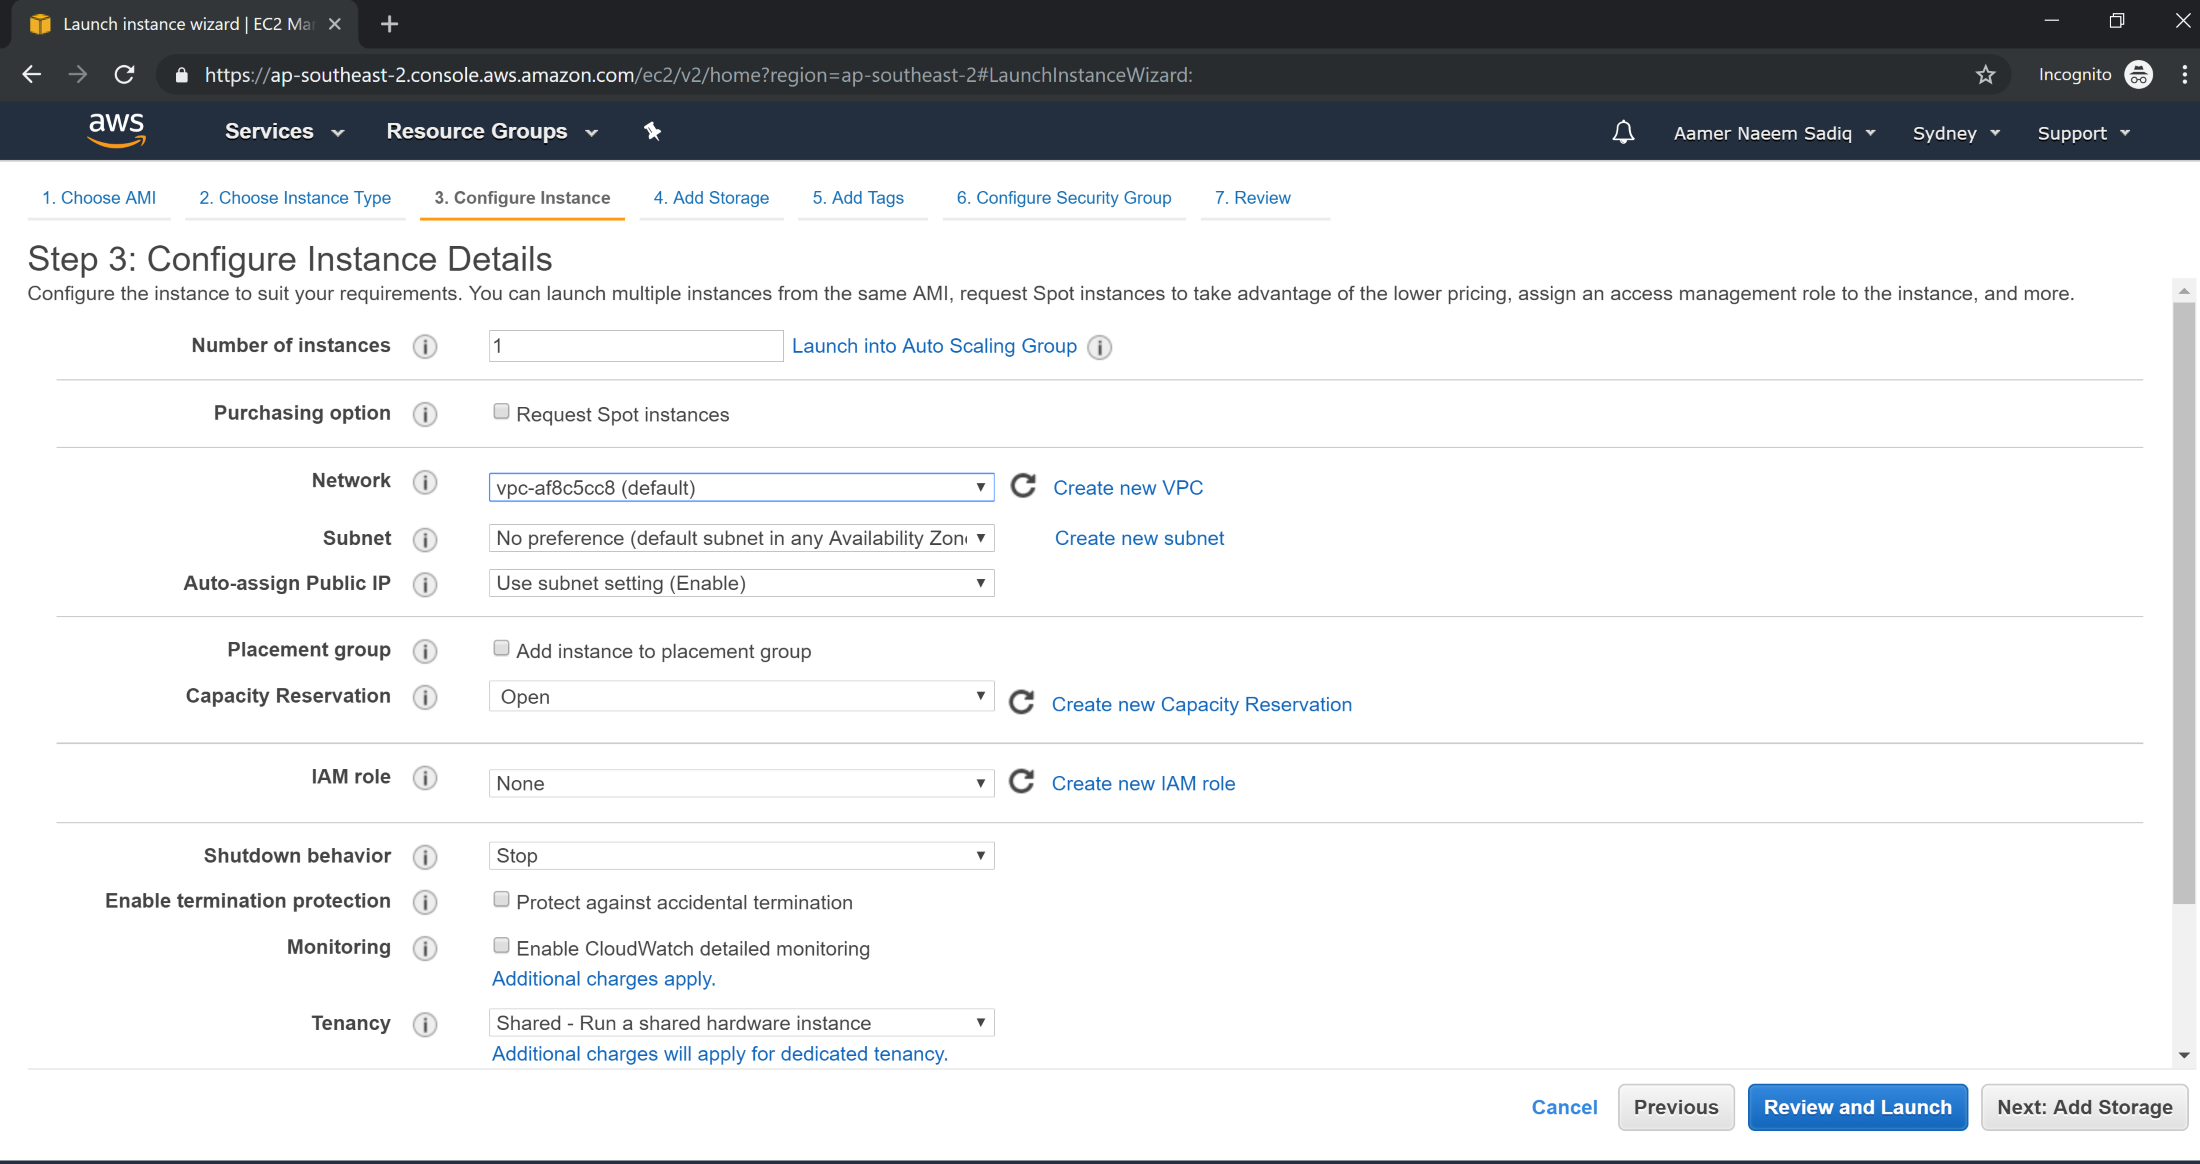
Leave everything in instance details as default. Click Add Storage.
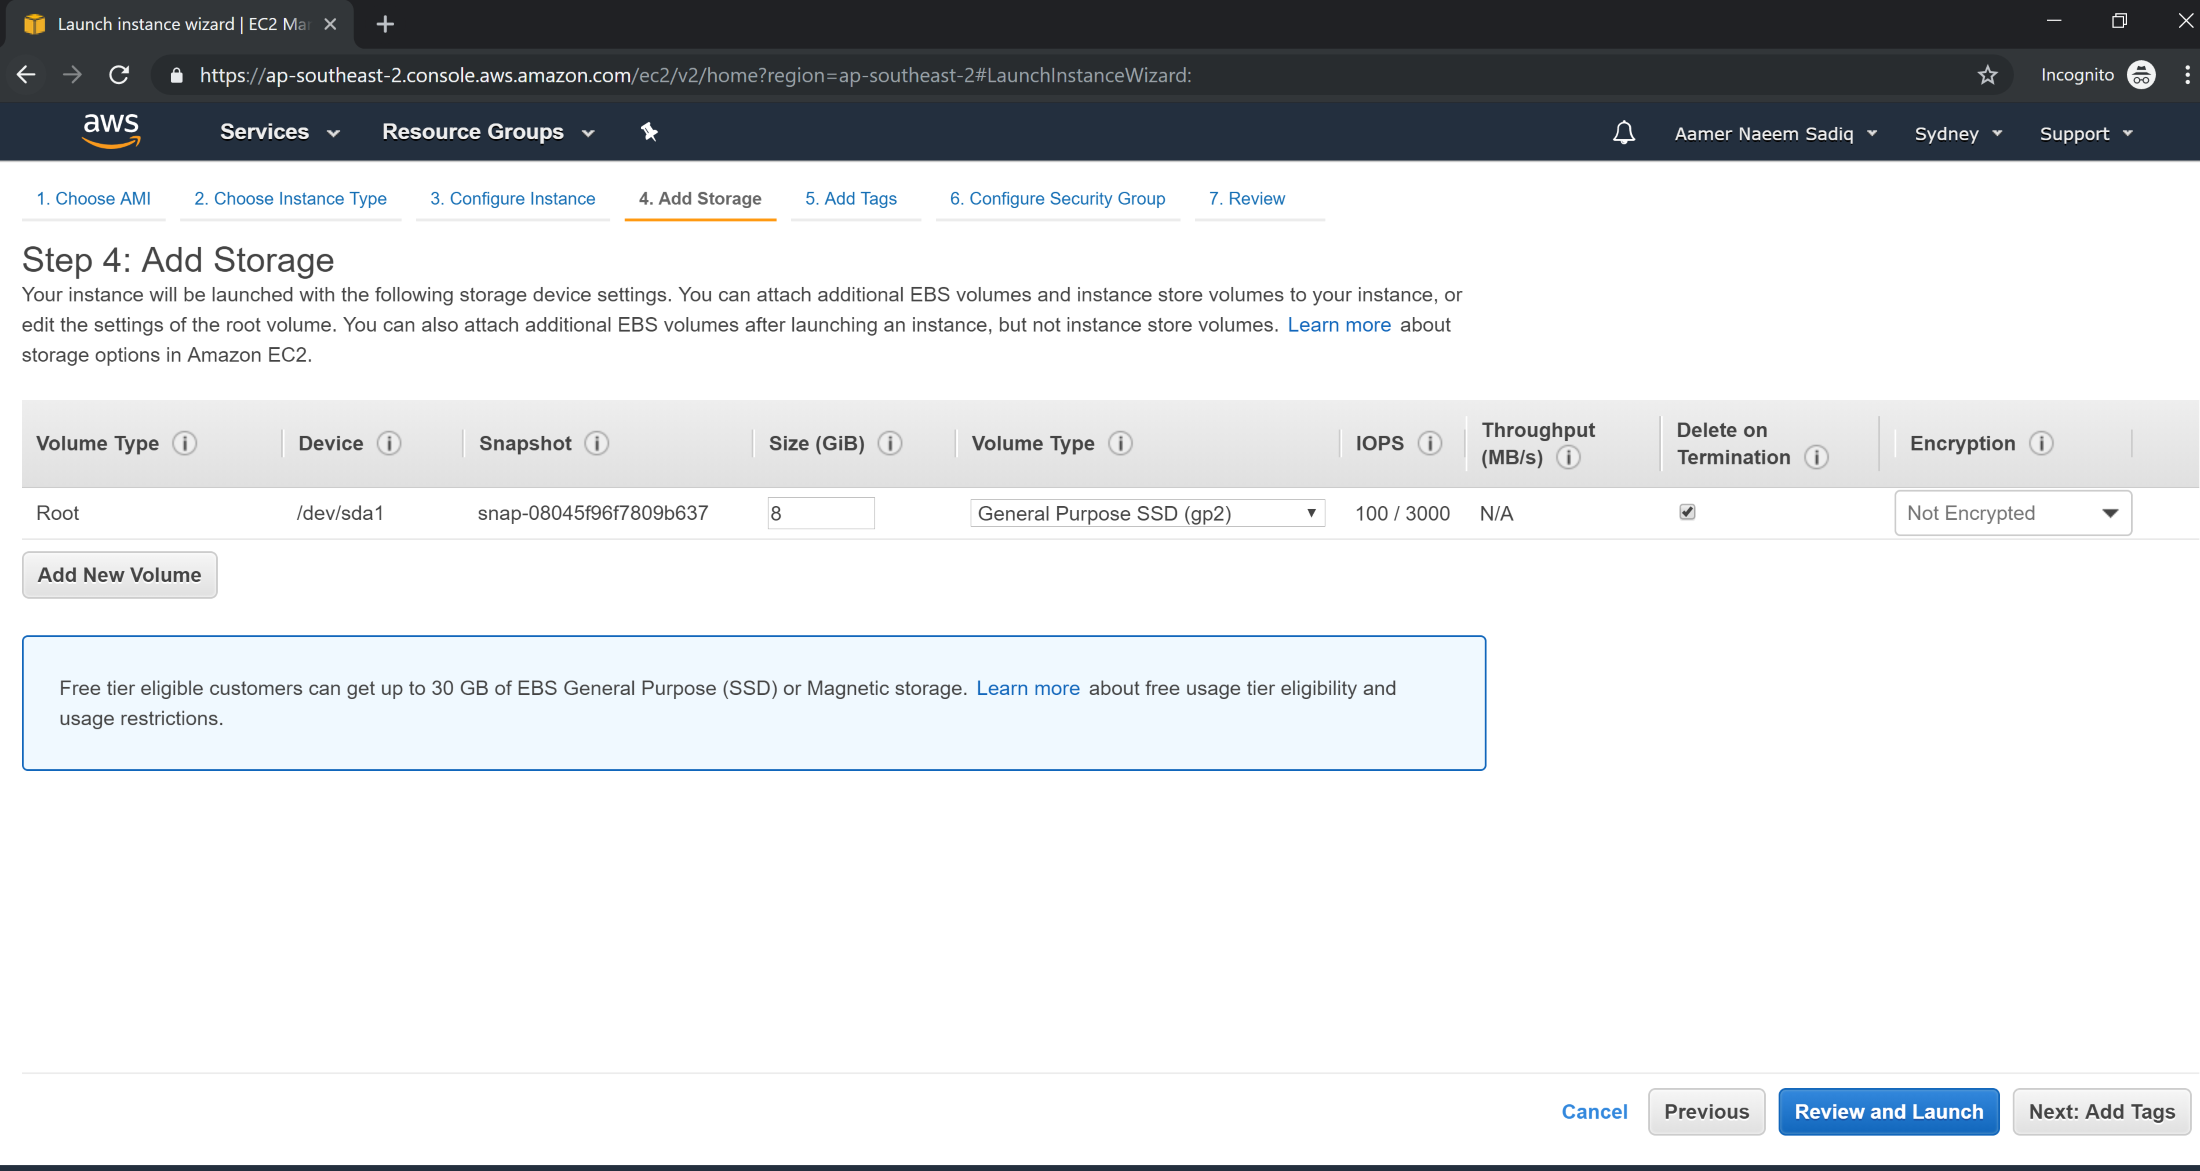
Leave everything in storage options as default. Click Add Tags.
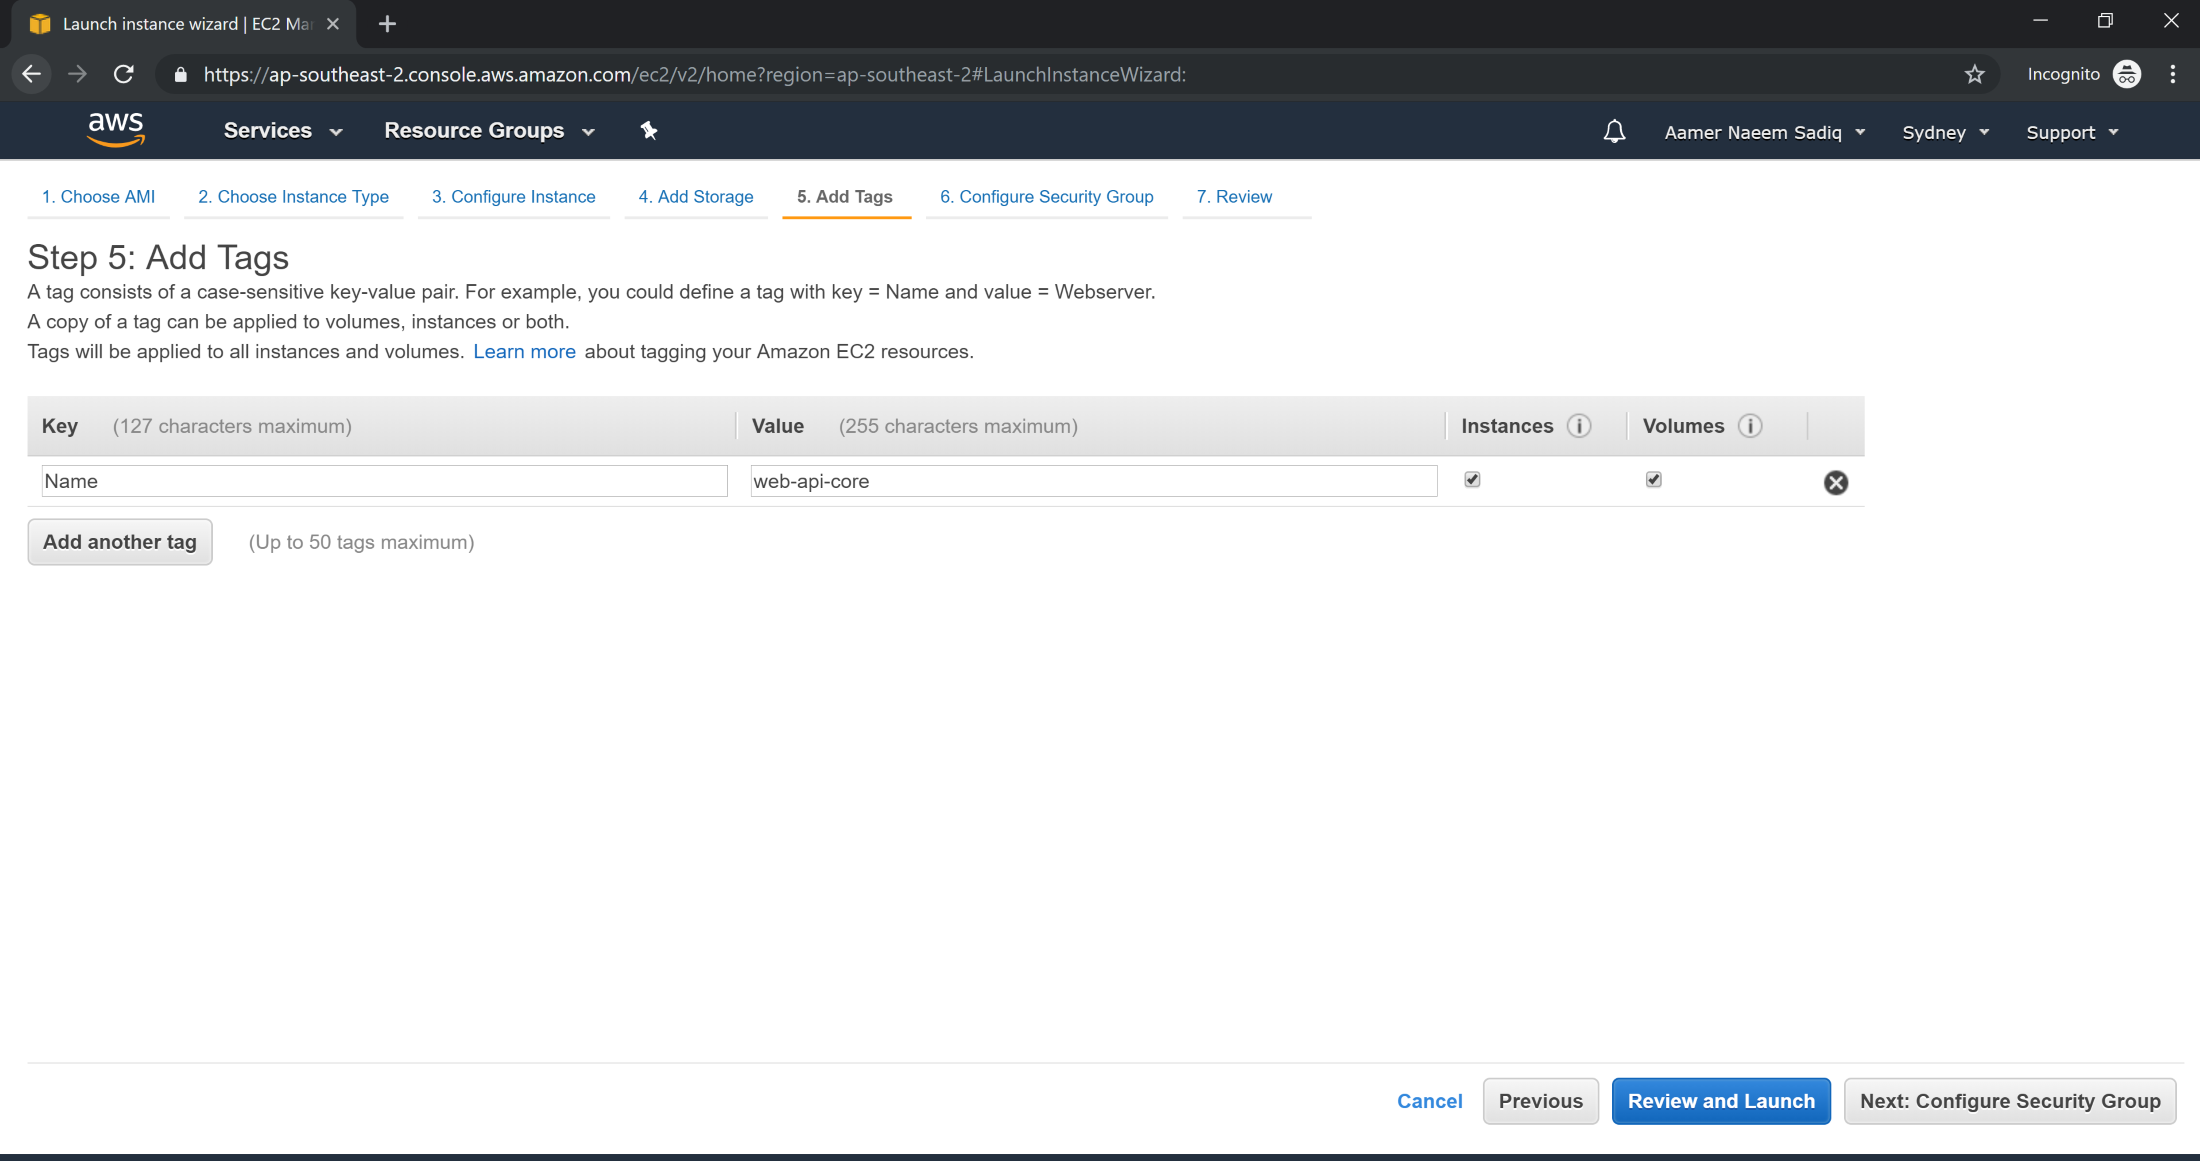
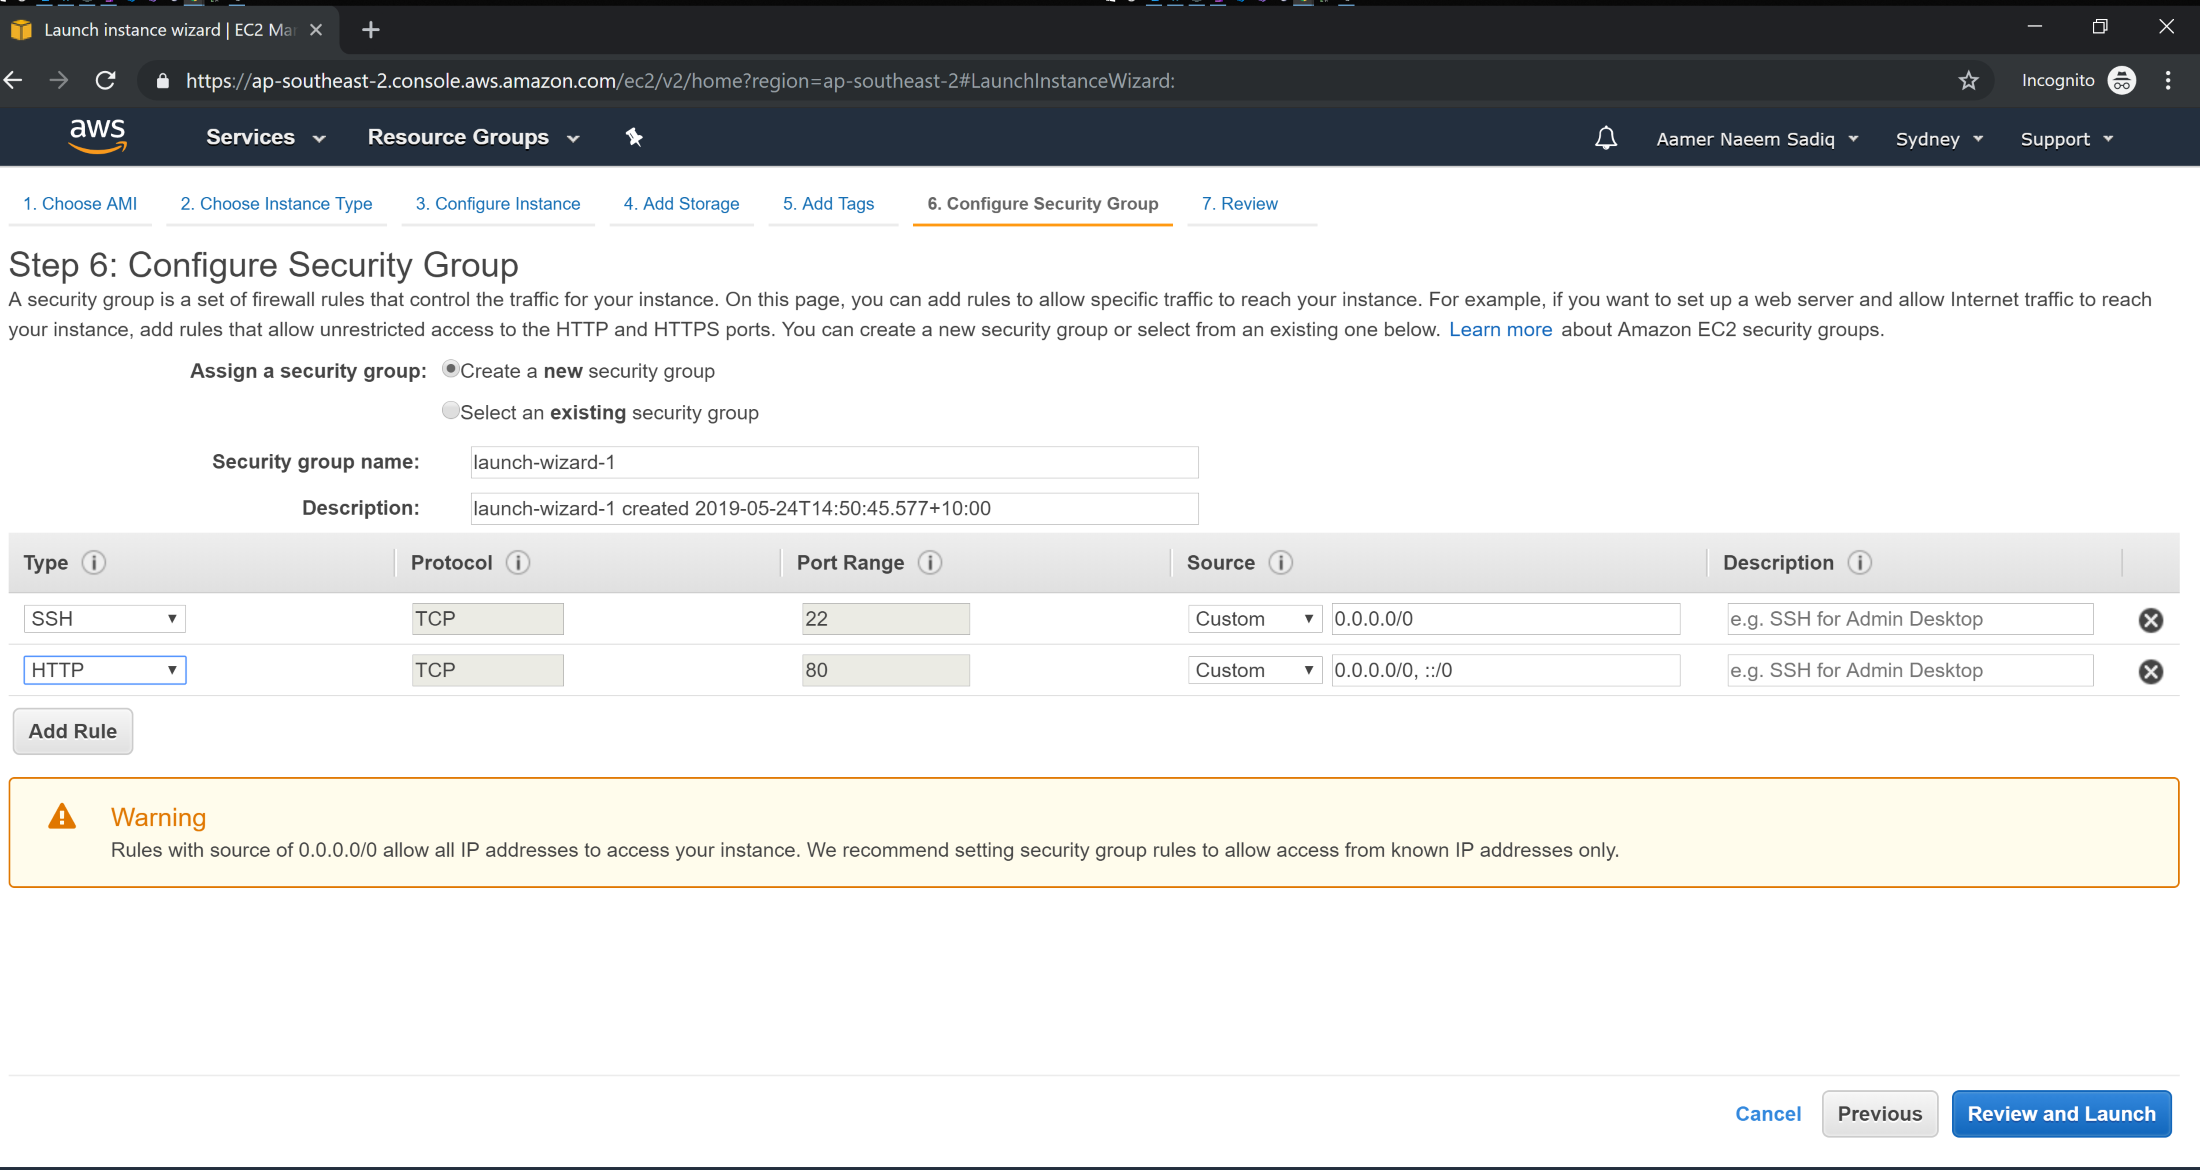
Create a new Name tag as below (or you can leave it empty). Then click Configure Security Groups.
Make sure SSH and HTTP ports are opened for access as below. Click Review and Launch.
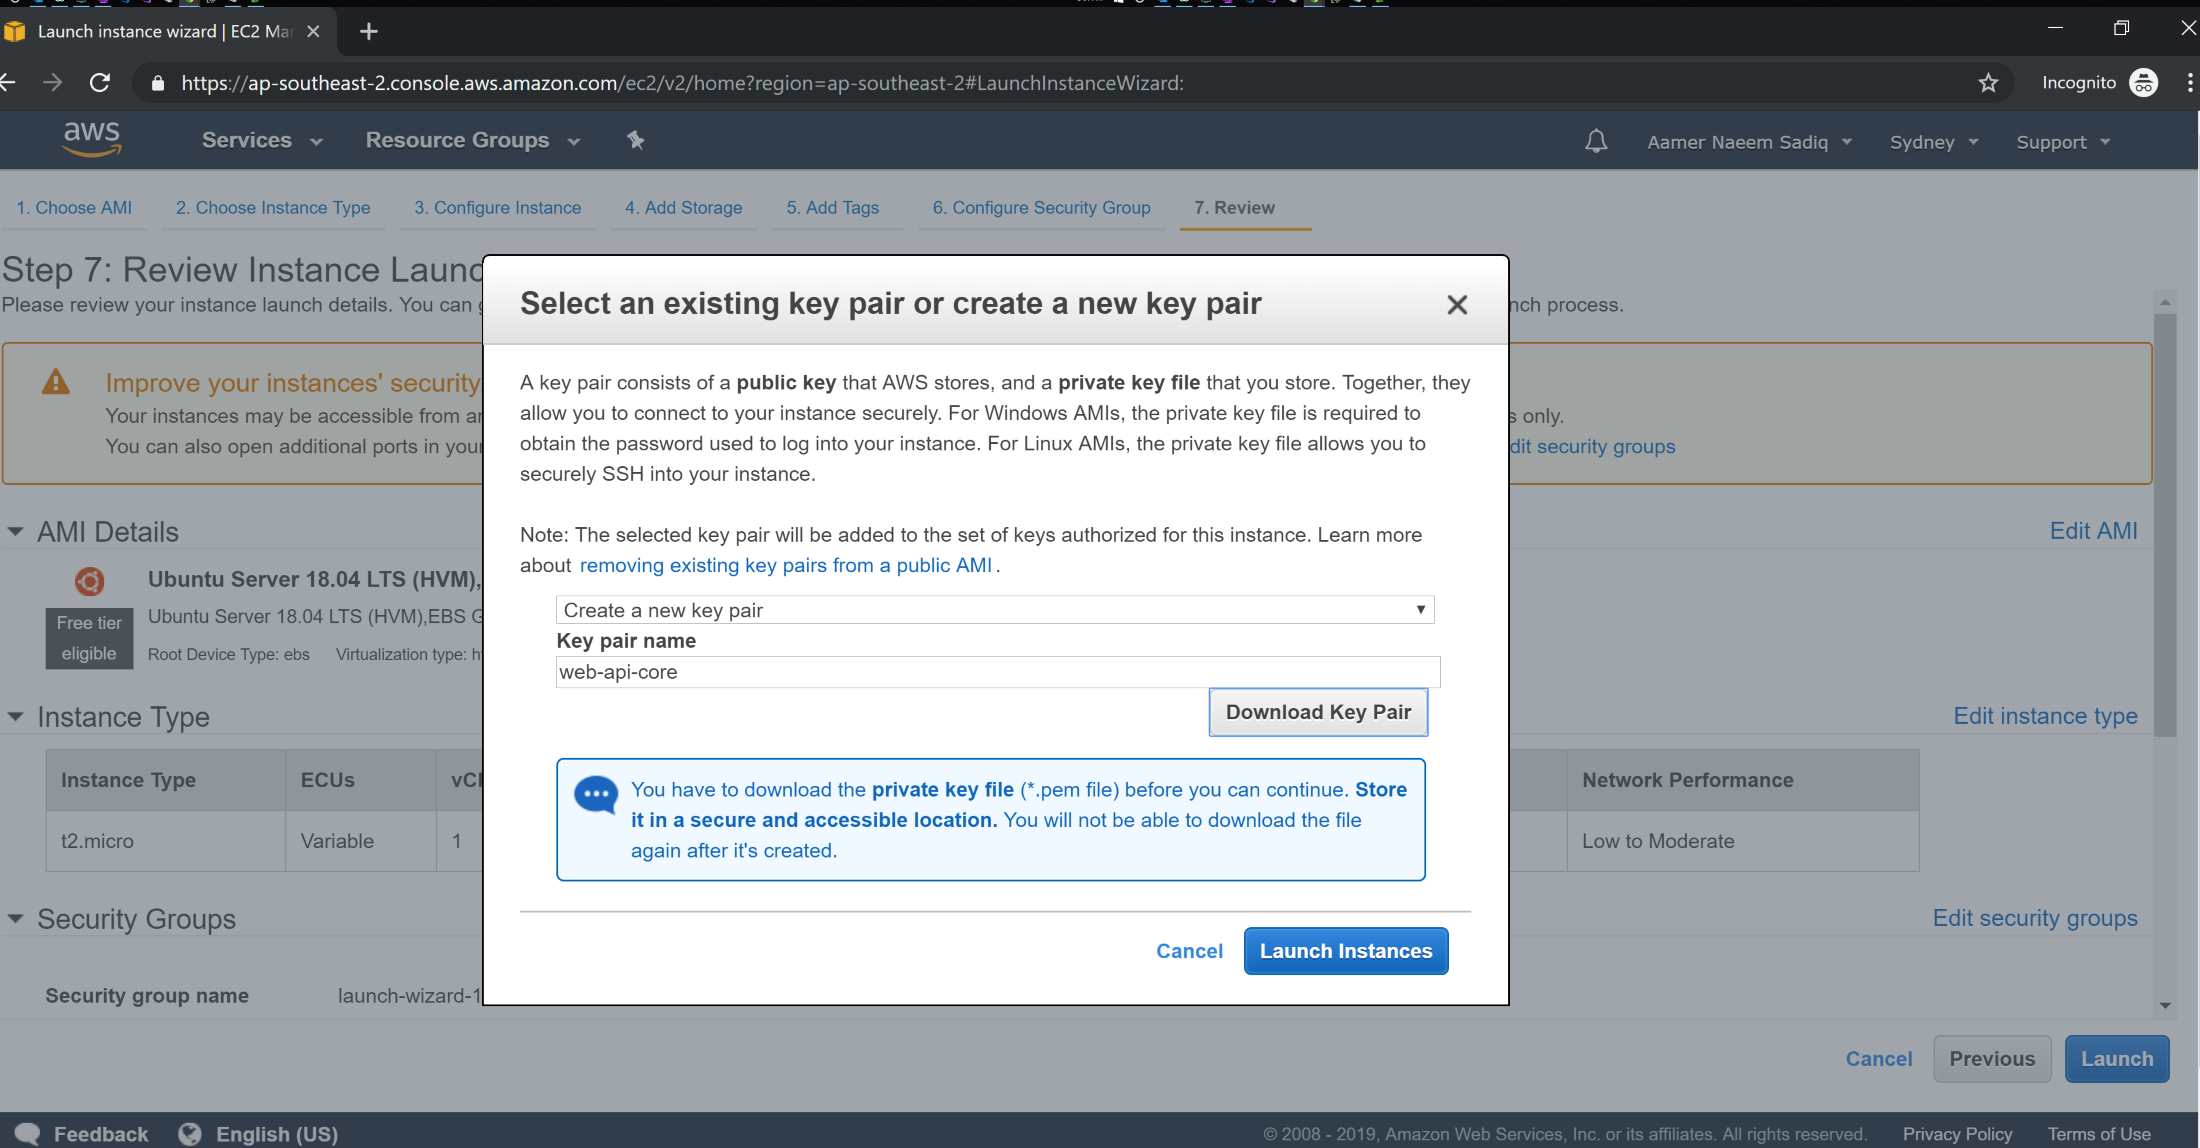
Review instance launch and hit Launch.

A key pair dialog will be displayed. Choose Create a New Key Pair and give it a meaningful name and download to local disk. The key is crucial for connecting to EC2 instance and we will be using it later in Step 4: Login to Linux EC2 Instance. After downloading the key pair, click Launch Instances.
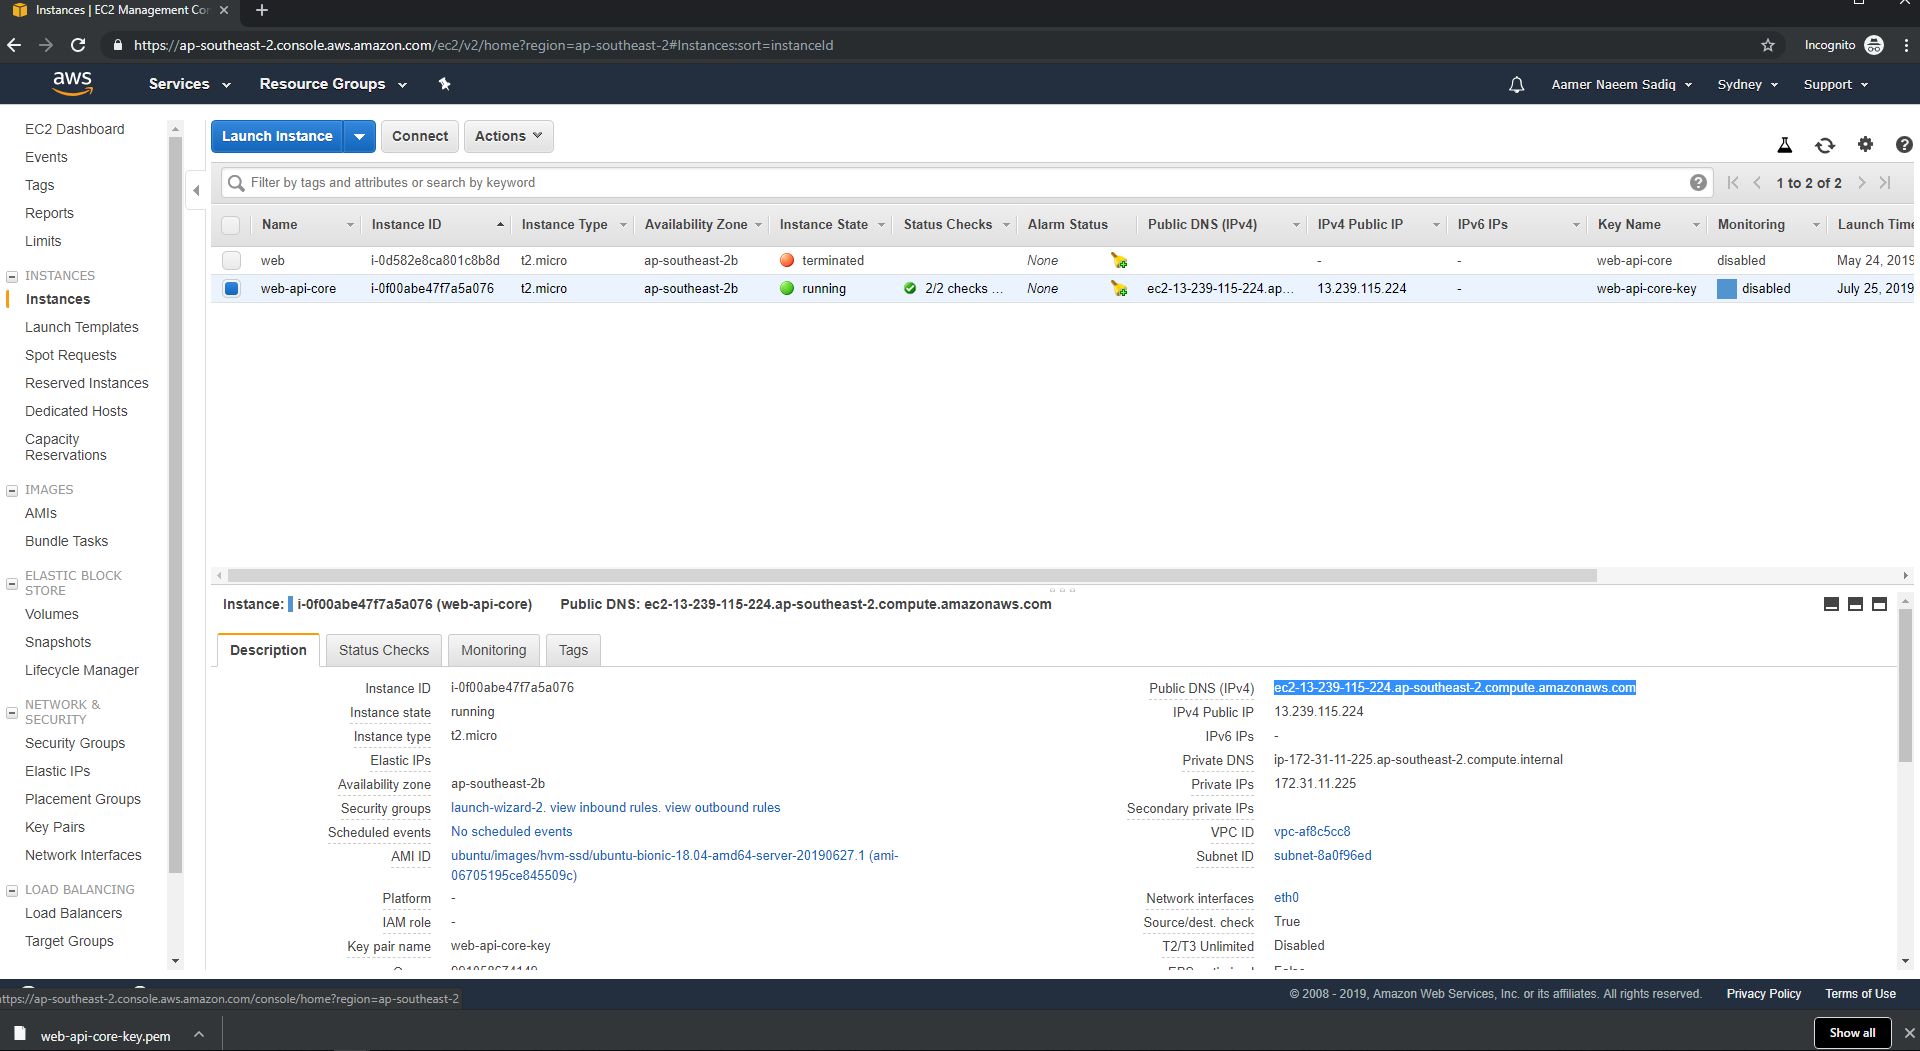
Go to EC2 -> Instances view to see the list of launched instances. Our instance should be there. Please note the Public DNS as it will be used in Step 4: Login to Linux EC2 Instance.
Step 4: Login to Linux EC2 Instance
There are several ways to connect to Linux instance. I will be using PuTTy. Please go ahead and download from here
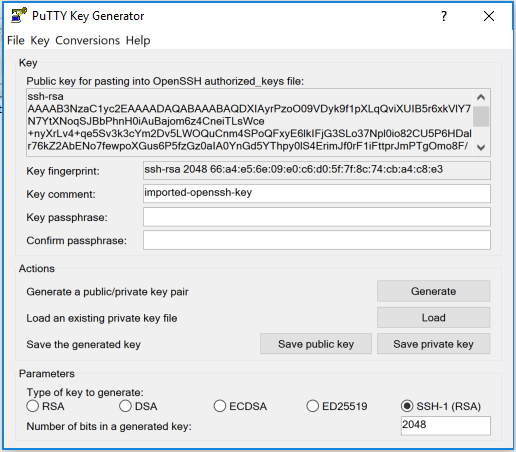
First thing after installing PuTTY is transform private key (downloaded in previous step) into the format that PuTTY can understand. To do so, we will be using a utilty PuTTYgen. This utility is included with PuTTY and should be installed on your system.
Open PuTTYgen, and then choose the SSH-2 (or SSH-1) RSA option to specify the type of key that you want to generate. Next, click the Load button and select your private key file (you will need to choose the All Files option in order to get the utility to display .PEM files). Now, click the Save Private Key (not Save Public Key) button as shown below (Don't worry about the message indicating that a pass phrase is not being used. Just specify a name for the private key file that is being created)
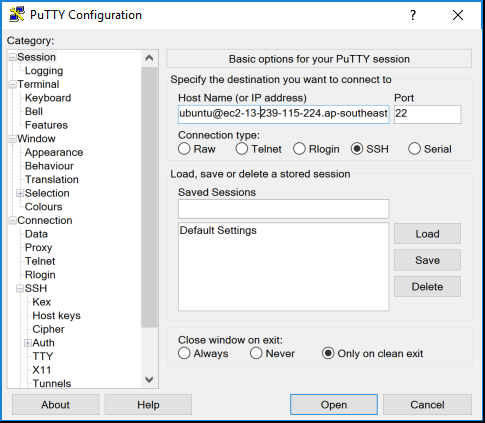
Now launch PuTTY. The first thing that we will need to enter is the host name. In our case it will be ubuntu@{public dns name of instance}. Please insert the public dns name of instance noted in previous step as below.
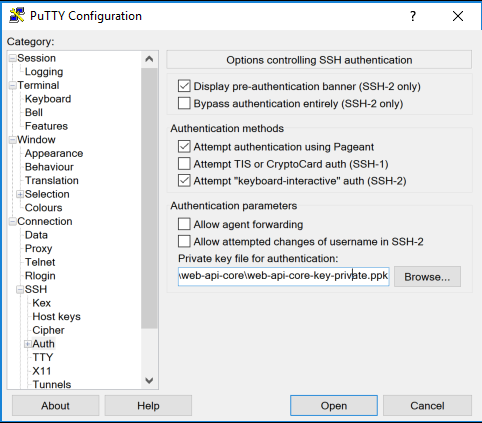
Now, navigate through the PuTTY console tree to Connection | SSH | Auth. Click the Browse button, select the private key file that we just created, and then click Open. It should looks like below.
You should be connected and logged in to your instance as below.

Step 5: Prepare the machine for DotNet Core
It's always good idea to update the instance to latest packages with following commands:
$ sudo apt-get update
$ sudo apt-get upgrade
$ sudo apt-get dist-upgrade
First step is to install dotnet core. Now, before installing, you should first check which dotnet core version is used in your application. You can check by running below command in the command line of machine where you are building your application.
$ dotnet --version
First, you’ll need to register the Microsoft key and product repository, and install required dependencies. This only needs to be done once per machine. Run the following commands on your PuTTY terminal.
$ wget -q https://packages.microsoft.com/config/ubuntu/16.04/packages-microsoft-prod.deb
$ sudo dpkg -i packages-microsoft-prod.deb
Now install dotnet core with the following commands.
$ sudo add-apt-repository universe
$ sudo apt-get install apt-transport-https
$ sudo apt-get update
$ sudo apt-get install dotnet-sdk-2.1.200
$ dotnet --version # to check dotnet core installed correctly
Let's now install nginx as reverse proxy for our application. It will be equivalent of iis on windows. We will use apt-get to install Nginx. The installer creates a systemd init script that runs Nginx as daemon on system startup. We will run the command below:
$ sudo -s
$ nginx=stable # use nginx=development for latest development version
$ add-apt-repository ppa:nginx/$nginx
$ apt-get update
$ apt-get install nginx
Since Nginx was installed for the first time, we have to explicitly start it by running:
$ sudo service nginx start
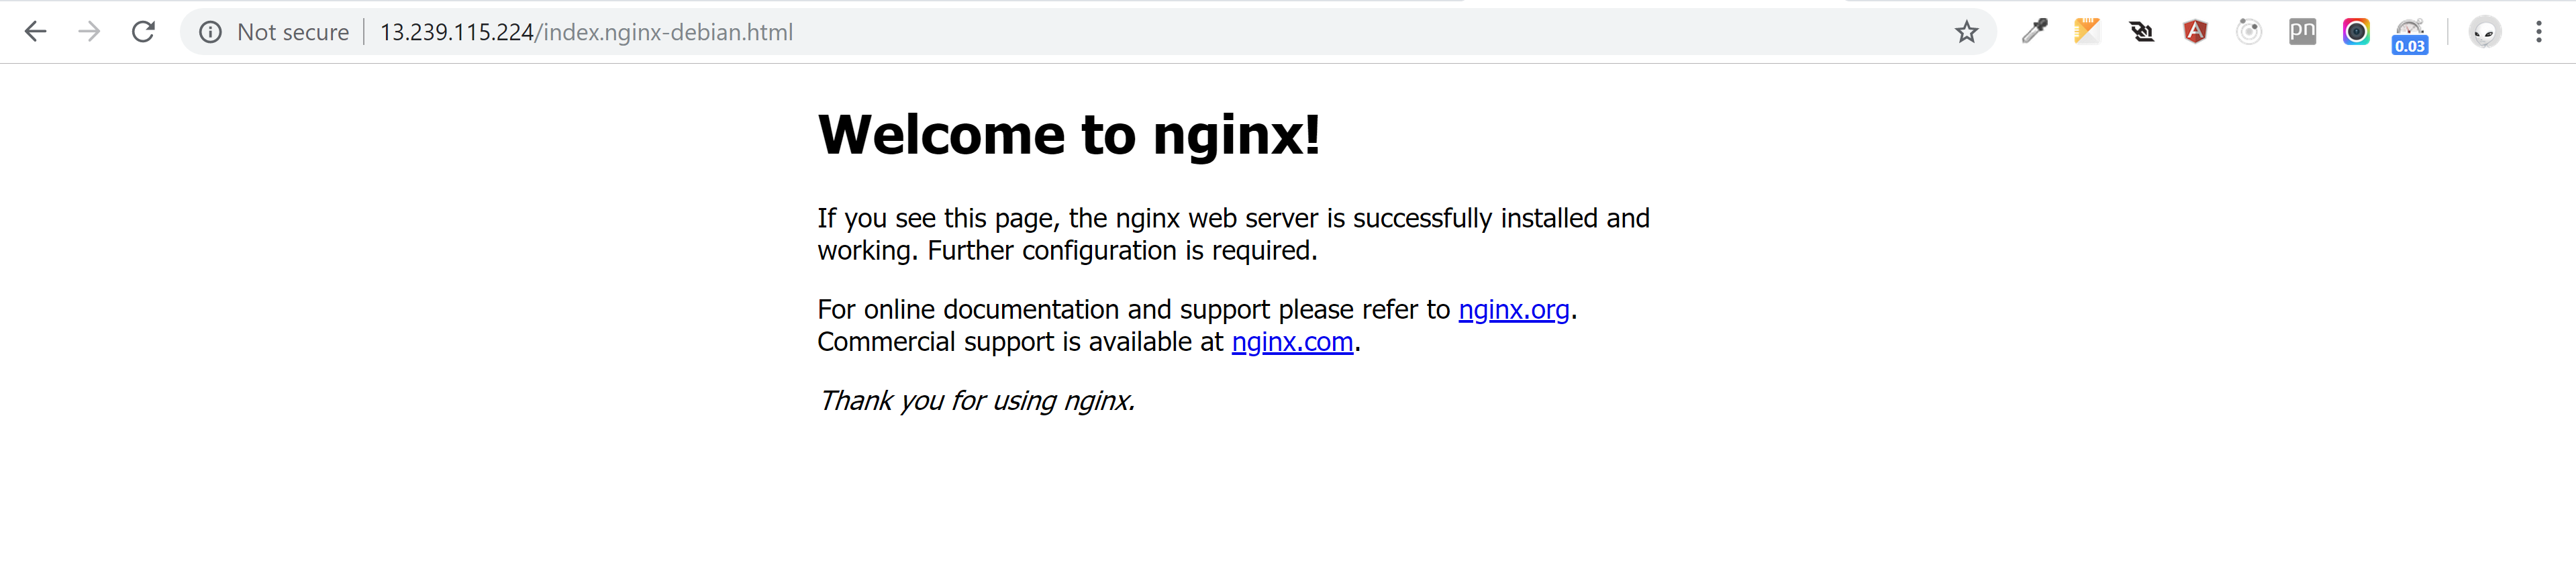
We can verify the installation from browser. Nginx landing page should be reachable at http://server_IP_address/index.nginx-debian.html or http://server_IP_address/ (you can use public ip address or public dns ). If it looks as below then your installation is successfull:
Lets configure Nginx as a reverse proxy to forward web requests to our ASP.NET Core app (which will be hosted at http://localhost:5000), we need to modify /etc/nginx/sites-available/default. Let’s open it in a text editor, and replace the contents with the following:
server {
 listen 80;
 location / {
 proxy_pass http://localhost:5000;
 proxy_http_version 1.1;
 proxy_set_header Upgrade $http_upgrade;
 proxy_set_header Connection keep-alive;
 proxy_set_header Host $host;
 proxy_cache_bypass $http_upgrade;
 proxy_set_header X-Forwarded-For $proxy_add_x_forwarded_for;
 proxy_set_header X-Forwarded-Proto $scheme;
 }
}
Once the Nginx configuration is established, we have to run following command to verify the syntax of the configuration files.
$ sudo nginx -t
If the configuration file test is successful, we will force Nginx to pick up the changes by running:
$ sudo nginx -s reload
At this point, http://13.239.115.224(or http://13.239.115.224/index.nginx-debian.html) will show 502 Bad Gateway status. This is because our application is not deployed and running.
Step 6: Deploy and run your application
Let create a new directory on EC2 instance to deploy our code into (also change permission to give write access):
$ sudo mkdir /var/www/api
$ sudo chmod 777 /var/www/api
Now, we will copy our application code to the EC2 instance. To copy our application, we will install WinSCP (WinSCP is a popular SFTP client and FTP client for Microsoft Windows). Please download and install from here
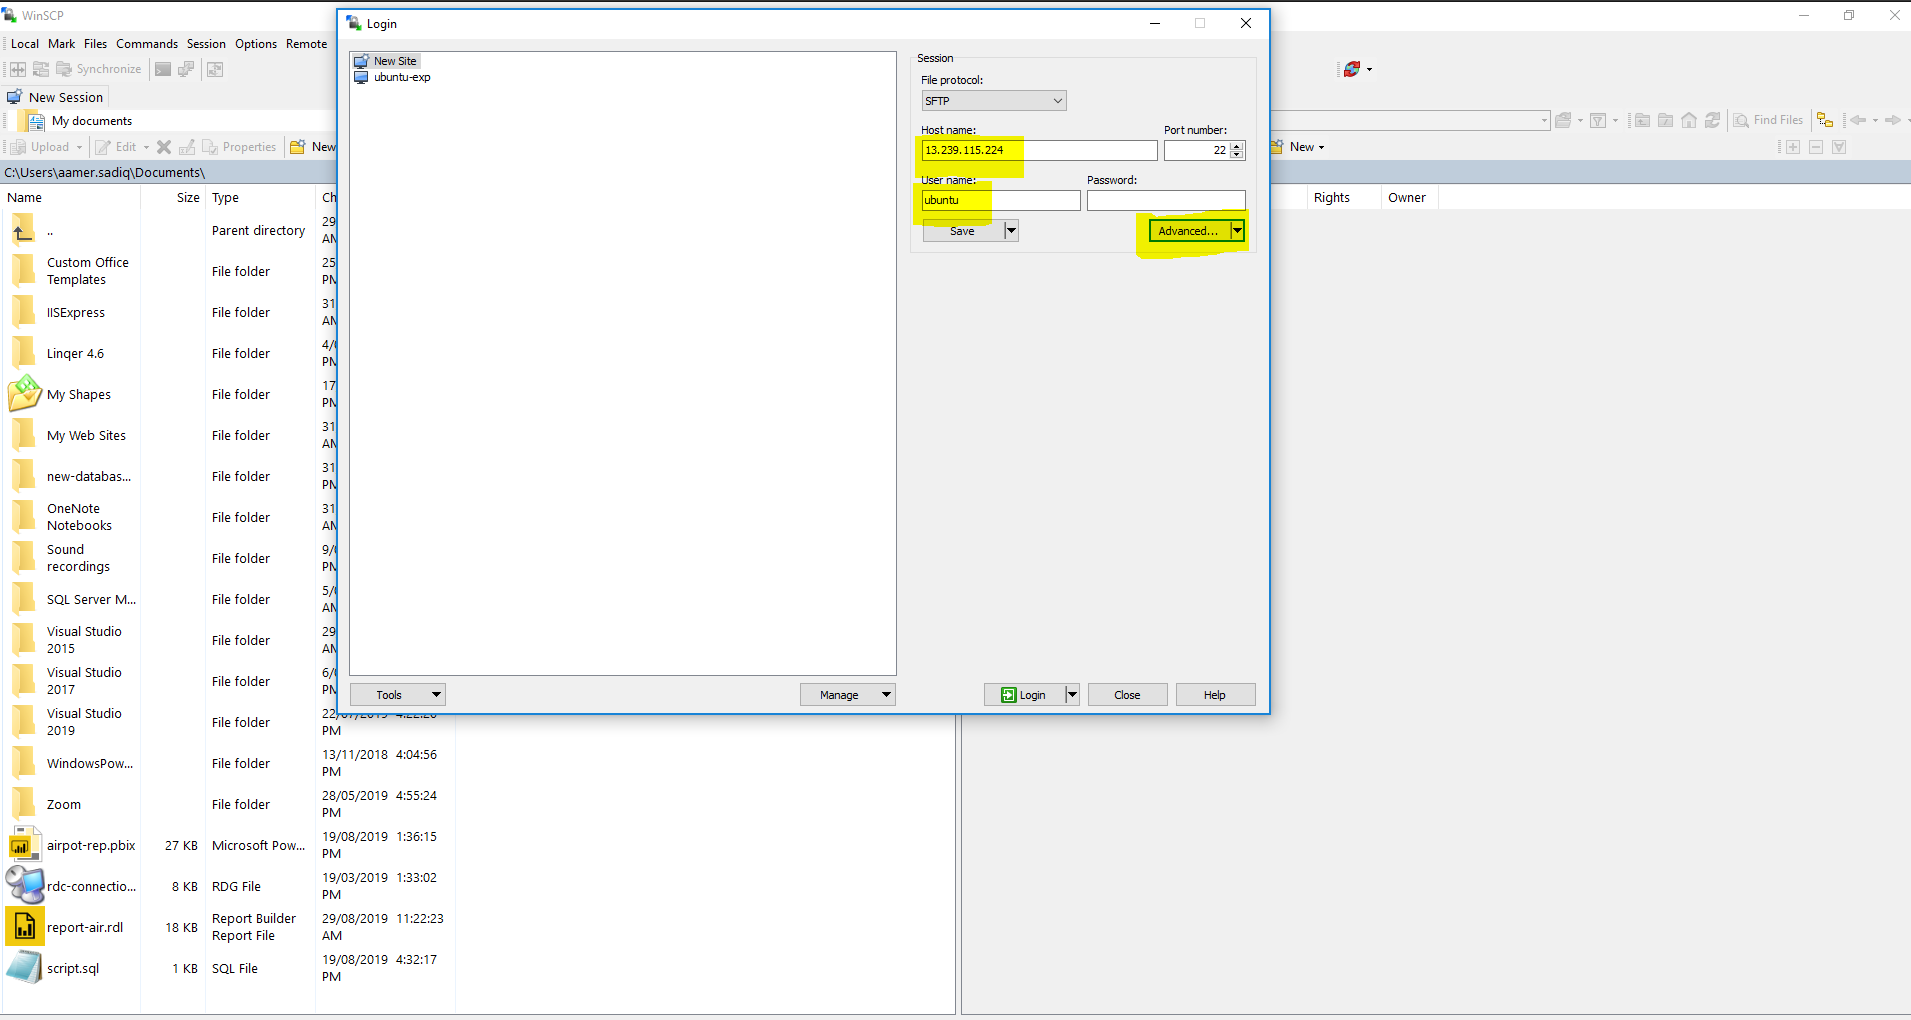
Now, let’s connet to our EC2 instance with WinSCP. Fill in the hostname and user name as below:
Next click on Advanced and choose Advanced from drop down to bring the Advanced Site Setting dialog as below:
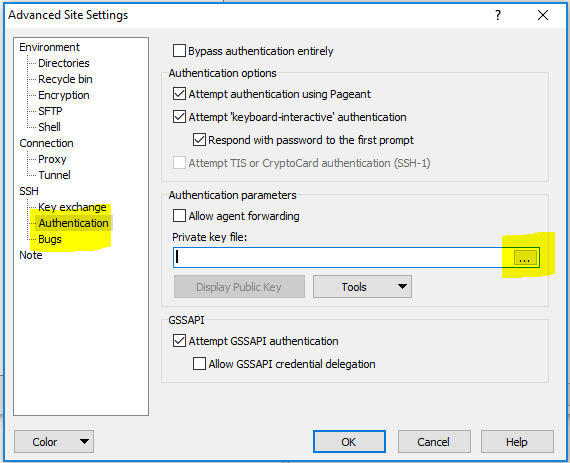
Select SSH -> Authentication and click ... to bring Select private key file dialog as below:
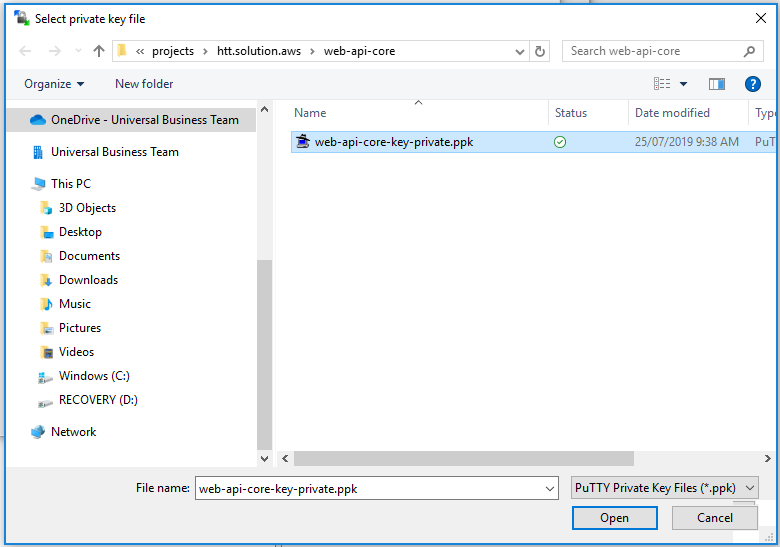
Select the private key created at the end of Step 3: Create AWS Linux EC2 Instance. Click Ok to close the dialog and then click Login to connect to EC2 instance.
After connecting successfully, you will see below screen:
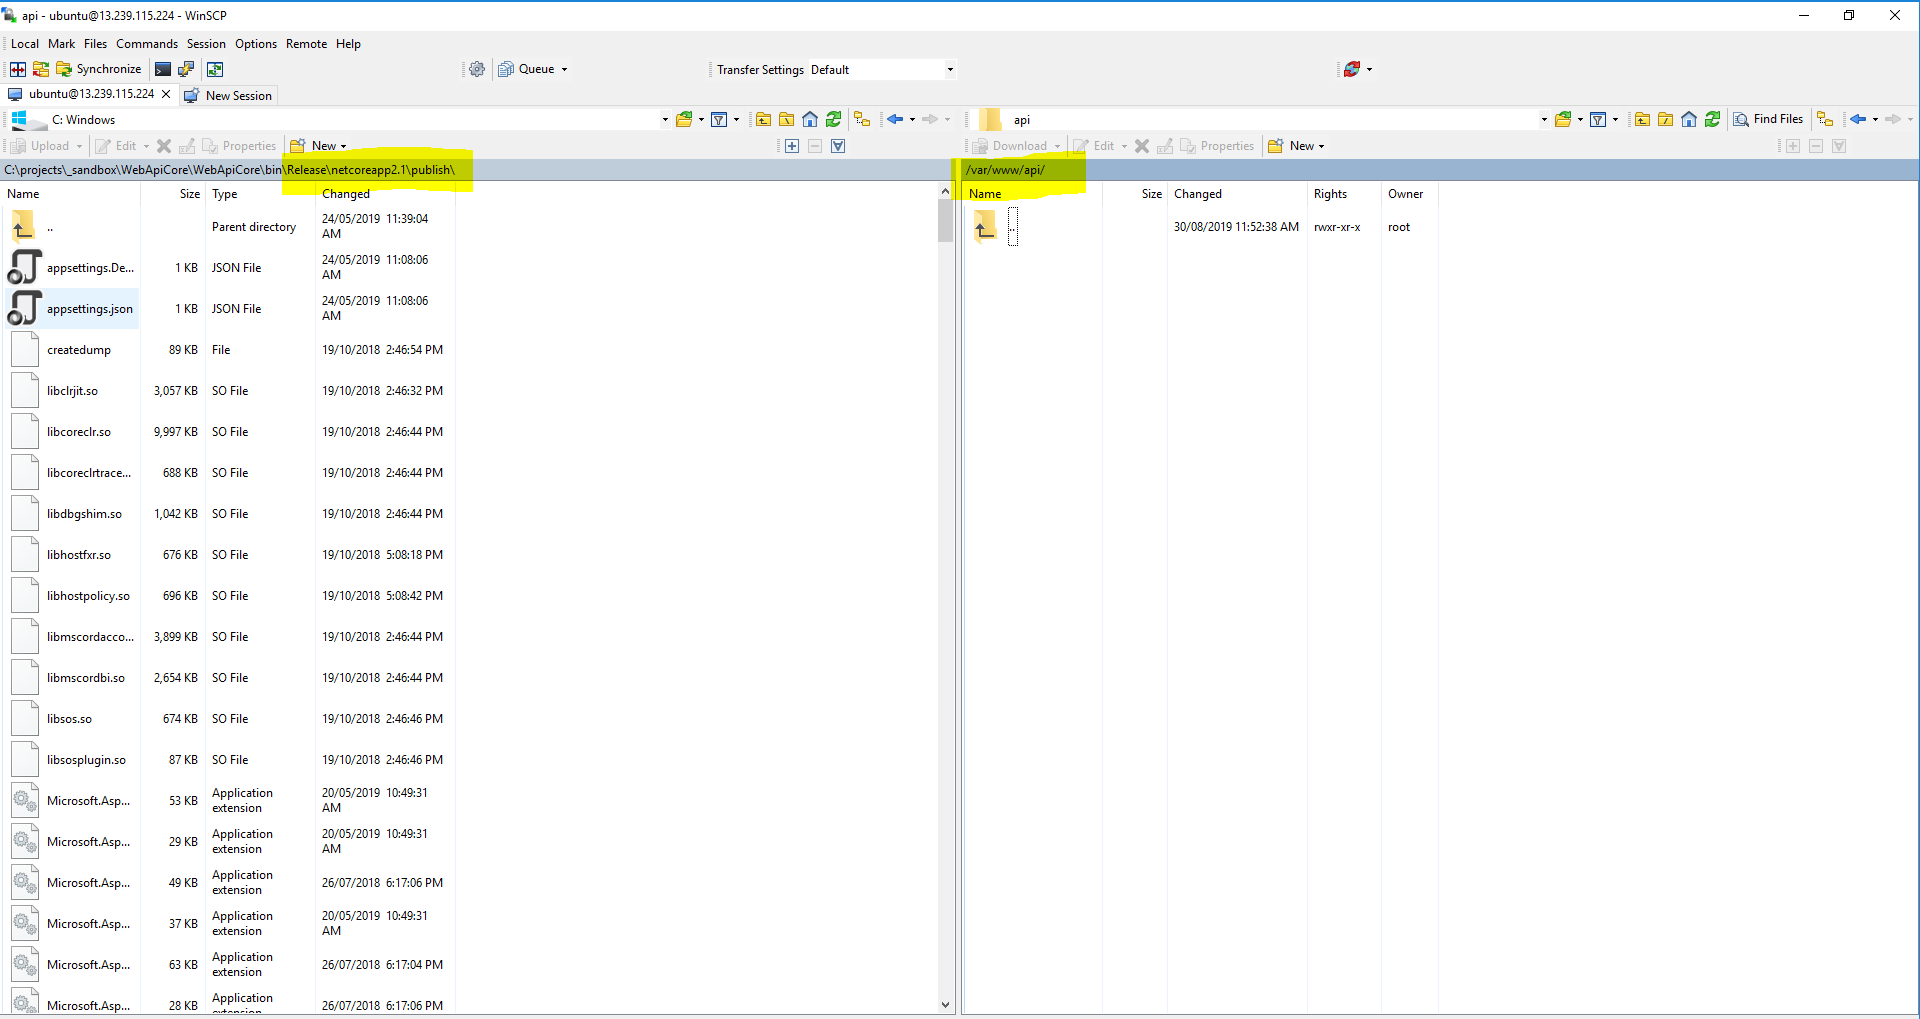
On the left is my local computer files showing the directory where we published the api code in Step 2: Create a deployment package. On the right is /var/www/api/ directory of my remote computer showing the files of the EC2 instance (you have to navigate to this folder).
Select all the files in left and click upload. Once completed, directory of remote computer like below:

Now navigate to /var/www/api/ directory on the remote machine and run the following command:
$ dotnet WebApiCore.dll
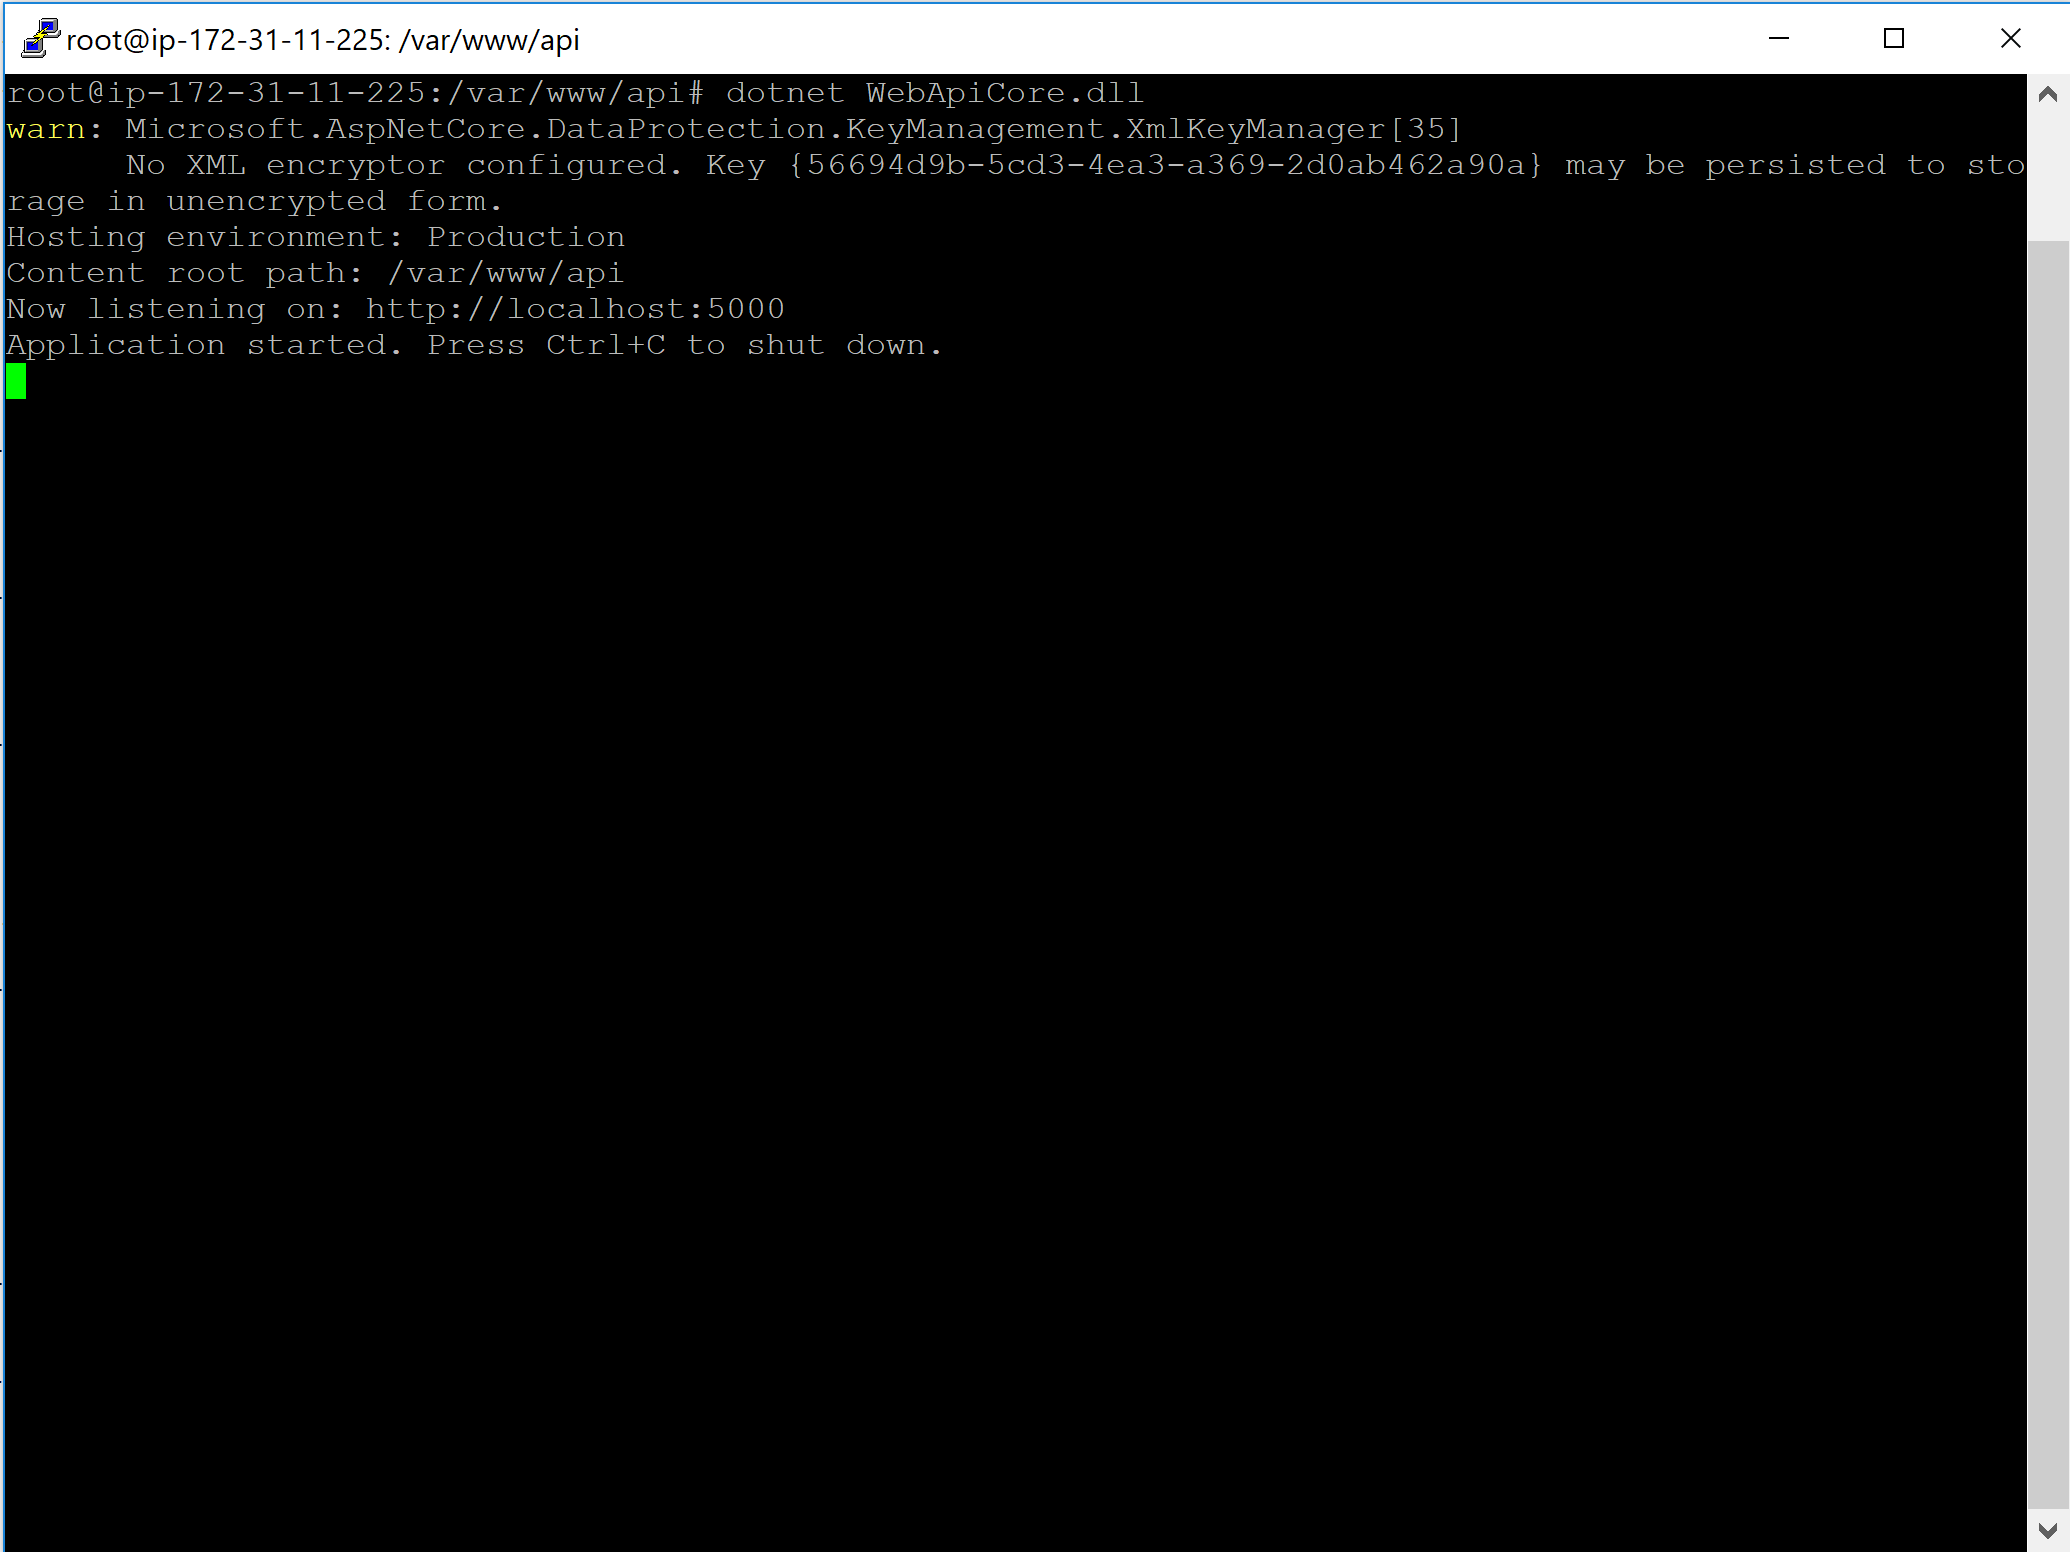
Now go to chrome and navigate to http://13.239.115.224/api/values and you will see the following view:
 This means our api is running successfull on Linux EC2 instance and is being served by Nginx.
Step 7: Running your application as service
But, if we close the PuTTY session, our application will stop. But, we don’t want that. We have to use systemd (systemd is an init system that provides many powerful features for starting, stopping, and managing processes) to create a service file to start and monitor the underlying web app. At first, we will create a service file for our web application.
$ sudo nano /etc/systemd/system/web-api-core.service
Then, inside that web-api-core.service file, i have included below configurations:
[Unit]
Description=DotNet Core application on Ubuntu

[Service]
WorkingDirectory=/var/www/api
ExecStart=/usr/bin/dotnet /var/www/api /WebApiCore.dll
Restart=always
RestartSec=10 # Restart service after 10 seconds if dotnet service crashes
SyslogIdentifier=offershare-web-app
Environment=ASPNETCORE_ENVIRONMENT=Production

[Install]
WantedBy=multi-user.target
Then, we need to enable the service and run it.
$ sudo systemctl enable web-api-core.service
$ sudo systemctl start web-api-core.service
$ sudo systemctl status web-api-core.service
The status command should show the service as running as below:
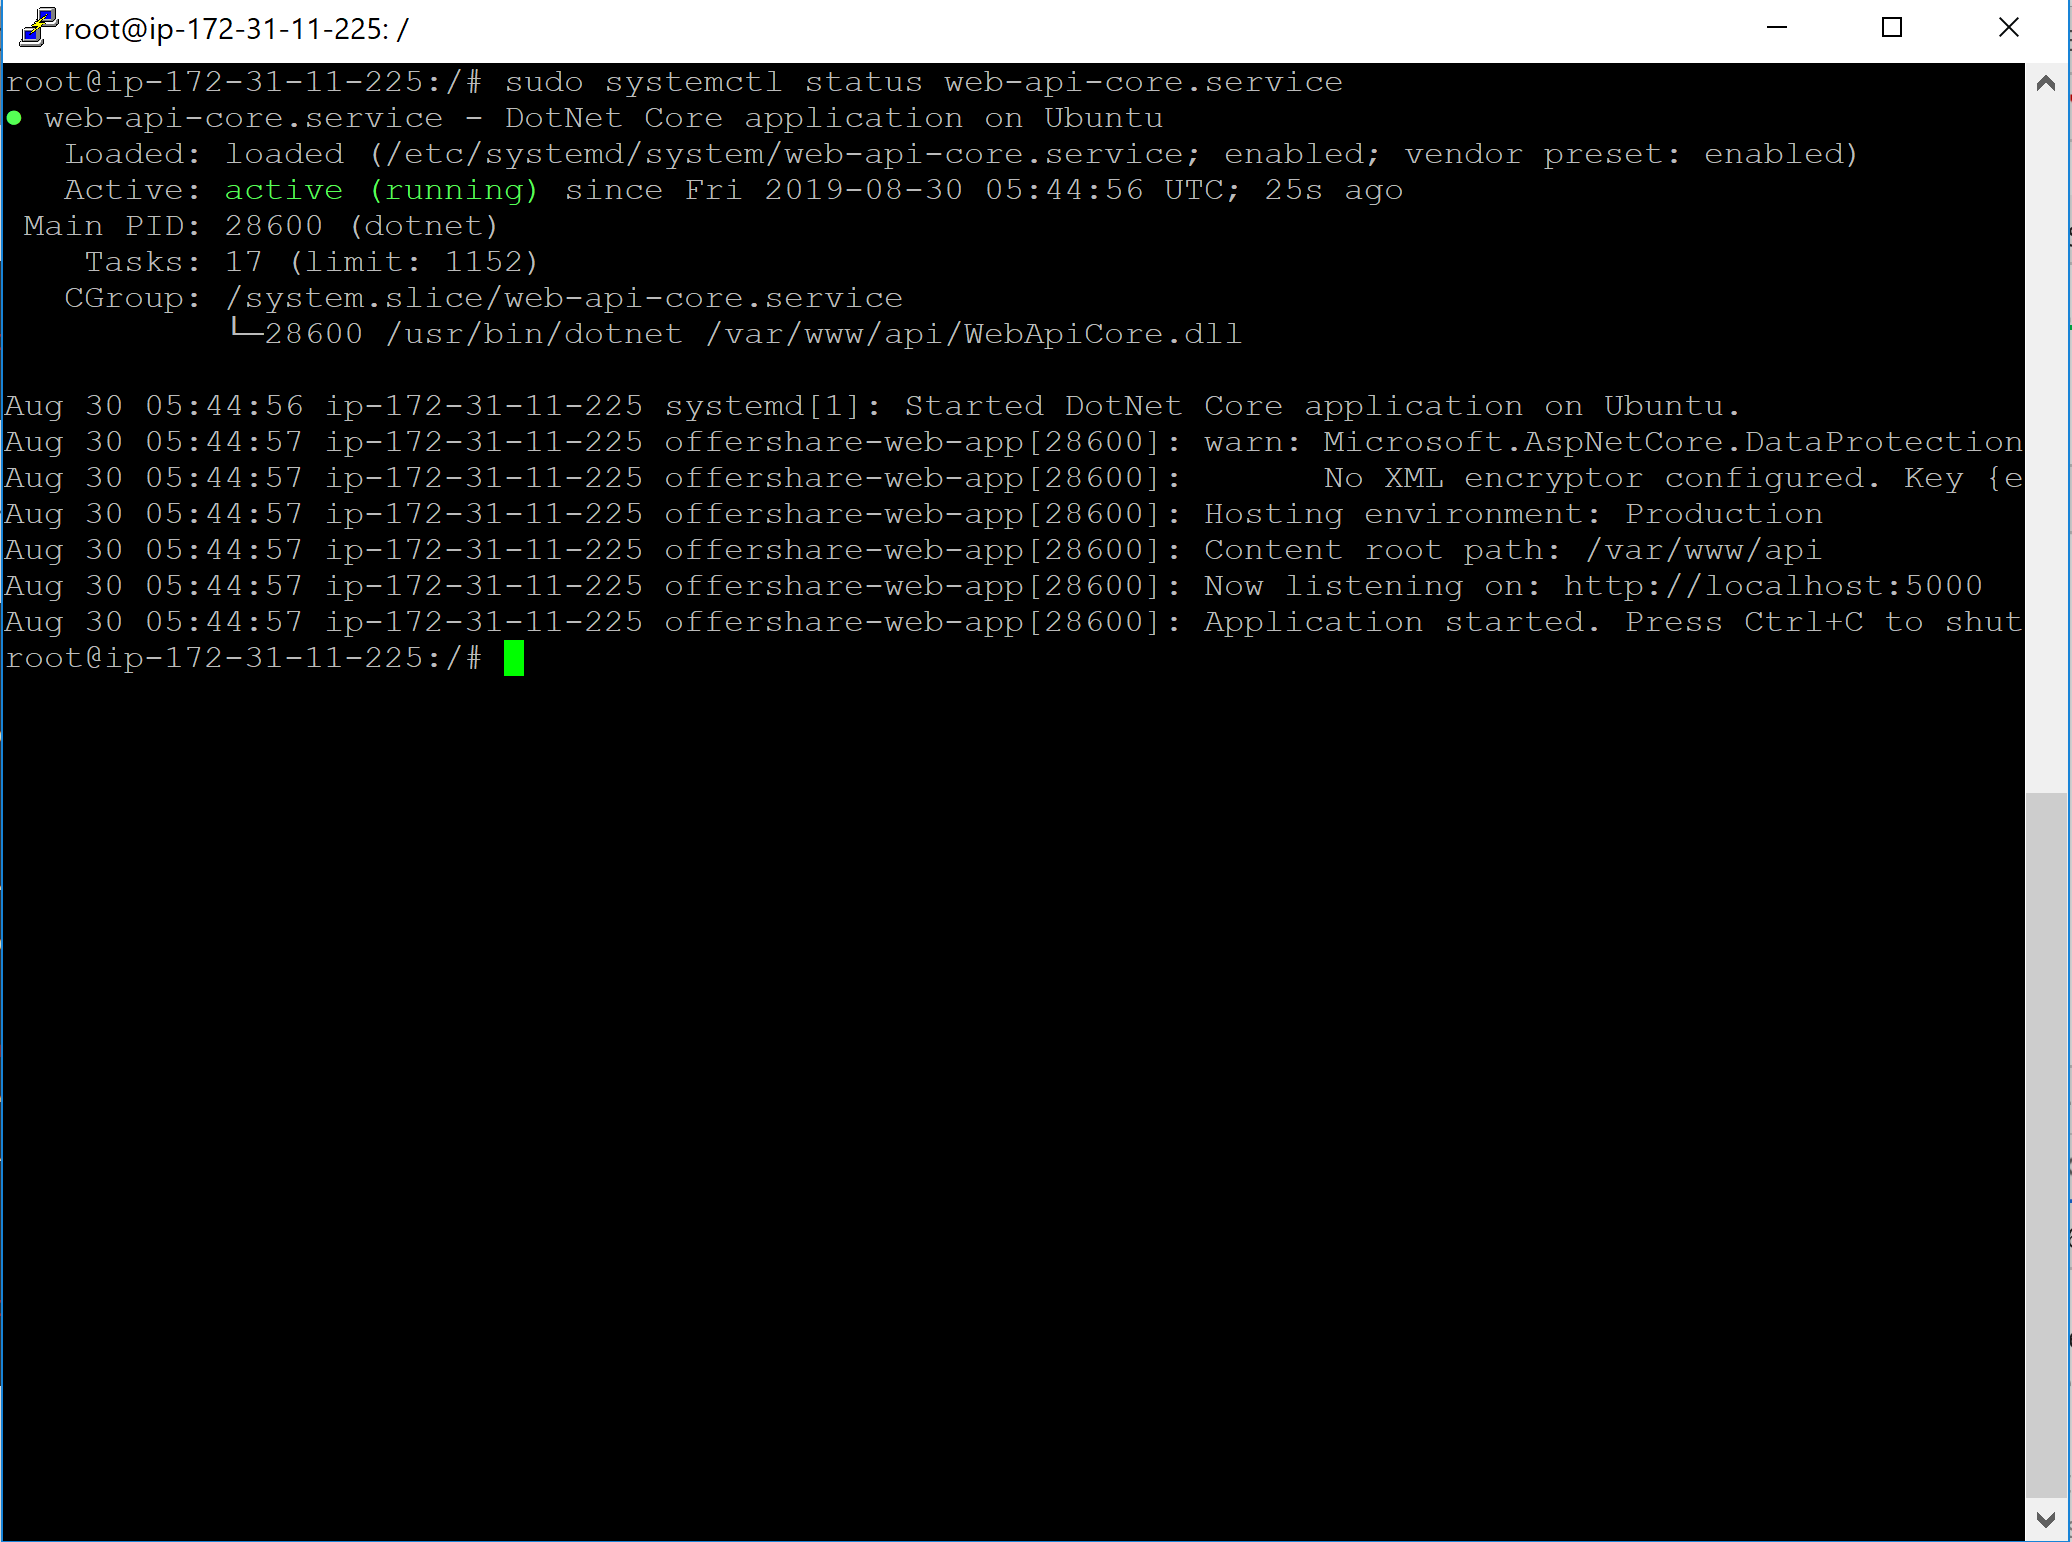
So, our web application is running. Kestrel by default listens on port 5000, so our application is available on http://localhost:5000.
Now, if we close the PuTTY session, our web application is still running.